 Pin it
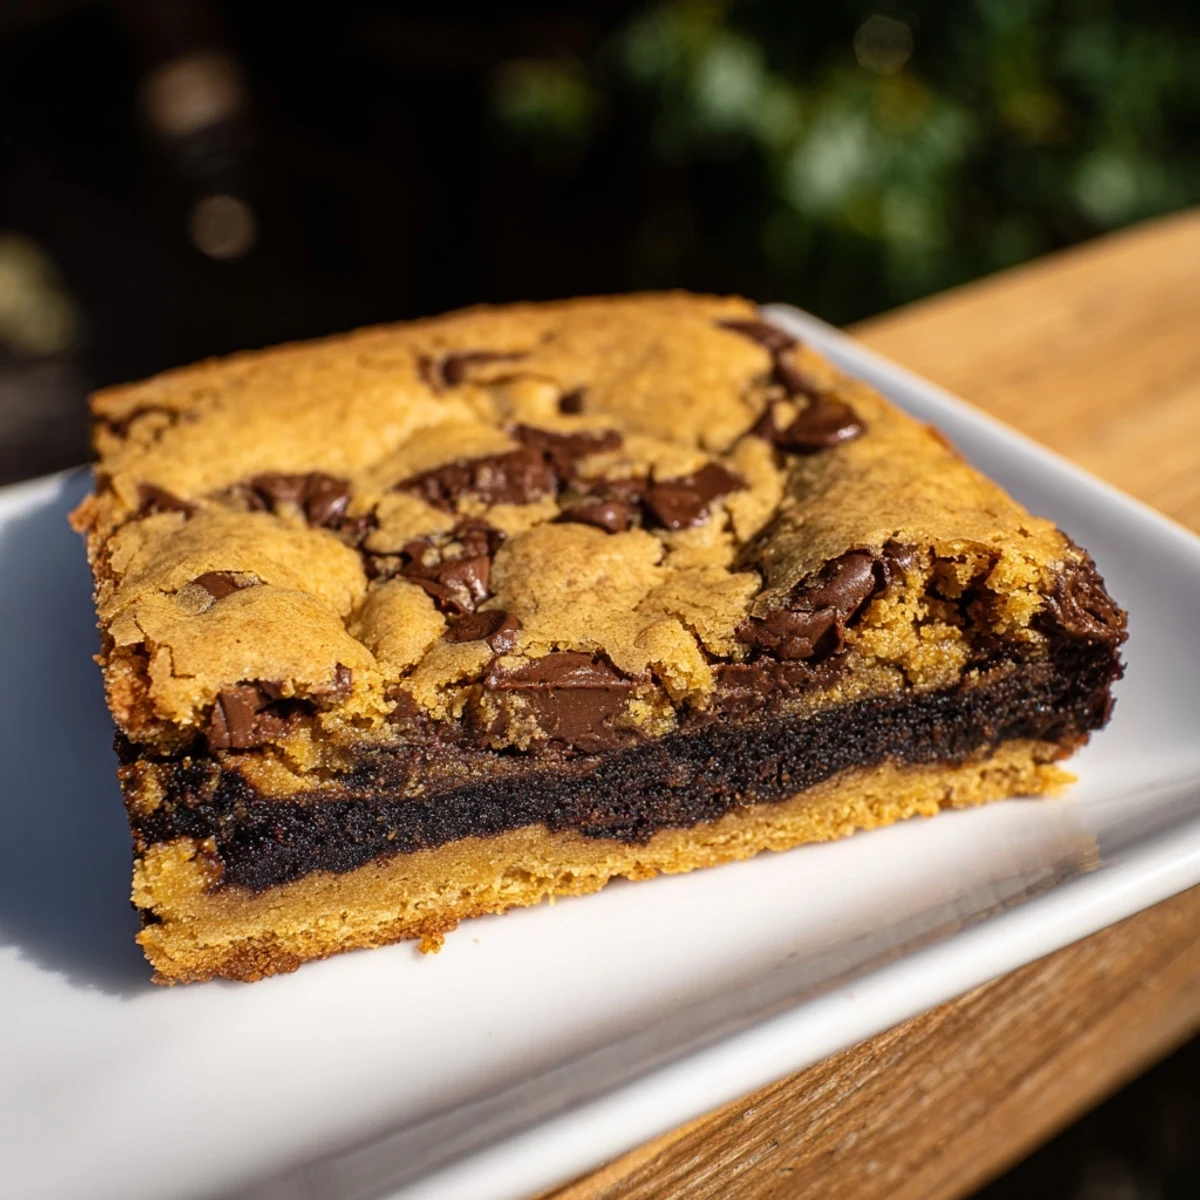
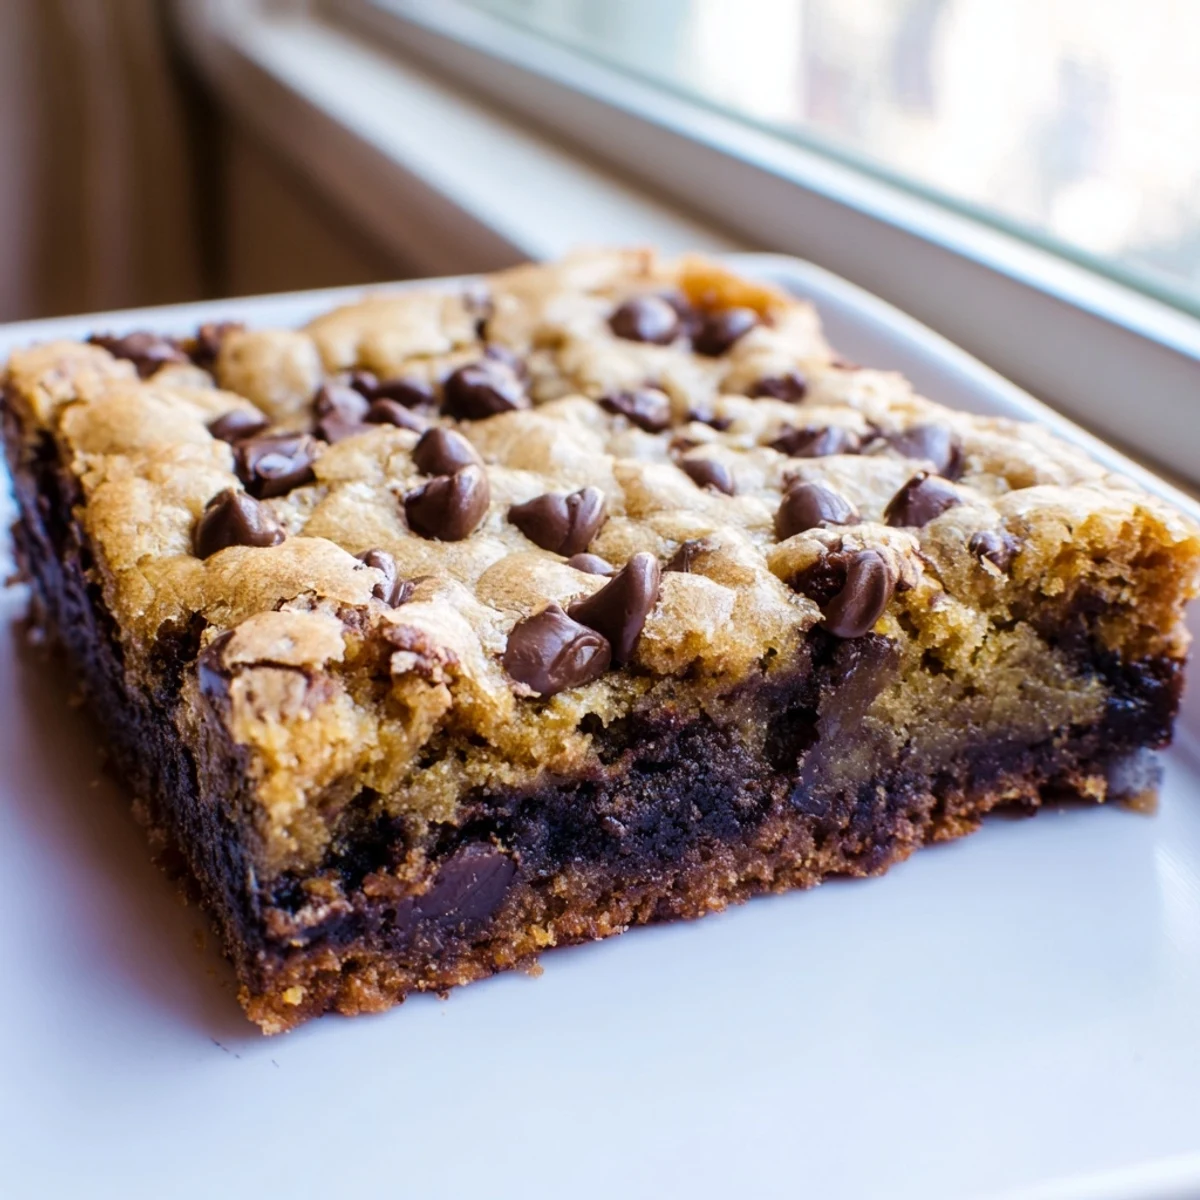
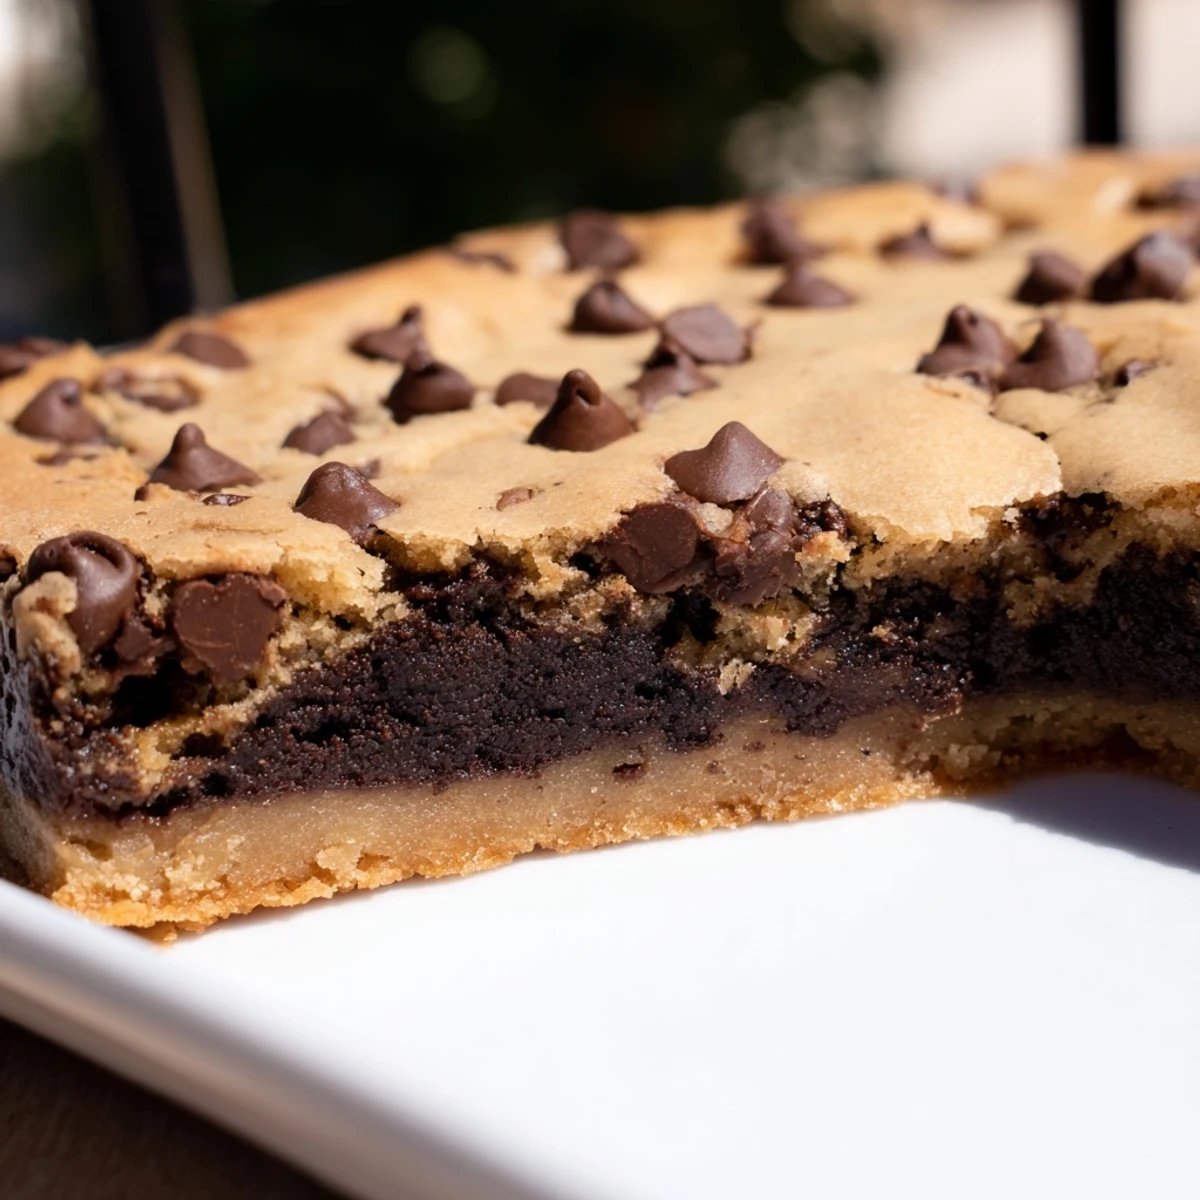
 These indulgent bars feature a rich fudgy brownie base crowned with classic chewy chocolate chip cookie dough, creating the ultimate two-texture dessert. The brownie layer delivers intense chocolate depth while the cookie topping adds buttery sweetness and pockets of melted chocolate chips. Perfect for gatherings or a special weekend treat.
The preparation comes together in about 20 minutes with a simple layering technique: spread the brownie batter first, then drop spoonfuls of cookie dough over the top. During baking, the two layers merge slightly while maintaining their distinct personalities. The result is a bar with a dense, fudgy foundation and a golden, slightly crisp cookie crown studded with chocolate chips.
The smell of brownies baking was basically my love language growing up, but the first time I dropped chocolate chip cookie dough on top of half-baked brownie batter changed everything. My college roommate walked into the kitchen, took one look at the pan, and asked if I'd lost my mind or found genius. That experimental Friday night became our go-to study break treat for the rest of the year.
I made these for my nephew's birthday last summer and watched six kids go completely silent after the first bite. His little brother looked up with chocolate everywhere and whispered, 'Auntie, you won.' Now they request them for every family gathering, and honestly, I'm not complaining.
Ingredients
- Unsalted butter (melted and softened): Using butter in two different states creates the perfect contrast between fudgy brownie and tender cookie layers
- Granulated and brown sugars: The combination keeps both layers moist while creating that irresistible crackly top on the cookie portion
- Large eggs: Room temperature eggs incorporate better and help both layers achieve the right structure
- Pure vanilla extract: Don't skimp here since vanilla bridges the gap between chocolate flavors
- Unsweetened cocoa powder: Dutch-processed cocoa gives the brownie layer that deep, almost dark chocolate intensity
- All-purpose flour: Standard flour works perfectly, no need for bread flour or cake flour here
- Salt: Just enough to enhance the chocolate without making these taste salty
- Baking soda: This lifts the cookie layer slightly while the brownie stays dense
- Semisweet chocolate chips: They hold their shape during baking and create pockets of melted chocolate throughout
Instructions
- Get your oven and pan ready:
- Preheat to 175°C (350°F) and line a 23 cm square pan with parchment, letting the paper hang over two sides like handles. This little trick makes lifting the bars out so much easier later.
- Make the brownie base:
- Whisk melted butter with both sugars until combined, then beat in eggs and vanilla until smooth. Sift in cocoa, flour, and salt, folding gently until just combined.
- Layer the brownie batter:
- Spread the brownie mixture evenly across your prepared pan. The batter will be thick, so take your time pressing it into corners.
- Prepare the cookie dough:
- Cream softened butter with both sugars until fluffy, then beat in egg and vanilla. Whisk flour, baking soda, and salt in another bowl, then gradually mix into the wet ingredients.
- Add the chocolate chips:
- Fold in the chocolate chips until they're evenly distributed throughout the cookie dough.
- Create the layers:
- Drop spoonfuls of cookie dough over the brownie batter and gently spread to cover. Its totally fine if some brownie shows through the gaps.
- Bake to perfection:
- Bake for 33 to 36 minutes until golden on top. A toothpick in the center should have moist crumbs attached, not come out clean.
- Patience pays off:
- Cool completely in the pan before slicing. This is the hardest part but absolutely essential for clean bars.
 Pin it
 My neighbor texted me at midnight after I dropped off a test batch, saying she ate three while standing at the counter. Something about the combination triggered a specific childhood memory she couldn't quite place. Now we bake them together whenever life feels overwhelming.
Getting the Texture Right
The magic happens in those last few minutes of baking, when the cookie layer turns golden but the brownie beneath stays dense. I've learned that slight underbaking beats overbaking every time. These bars continue setting as they cool, so trust that toothpick test with moist crumbs.
Customization Ideas
Sometimes I swirl peanut butter into the brownie layer before adding the cookie dough, creating a third flavor dimension. Other times, chopped walnuts or pecans in the cookie portion add crunch that cuts through the richness. Milk chocolate chips make these sweeter, while dark chocolate chips intensify the sophistication.
Storage and Serving
These actually taste better on day two, when the flavors have melded and the texture has set completely. Store them in an airtight container at room temperature for up to four days, or freeze individually wrapped bars for emergency dessert situations.
- Warm each bar for 15 seconds in the microwave before serving
- A scoop of vanilla ice cream makes these dangerously good
- Room temperature bars slice cleaner than chilled ones
 Pin it
 Every time I pull these from the oven, I'm reminded that the best recipes often come from questioning rules. Hope these become your new favorite way to satisfy that chocolate craving.
Recipe Q&A
- → Can I make these ahead of time?
-
Yes, these bars keep well for up to 3 days at room temperature when stored in an airtight container. You can also freeze them for up to 2 months. Thaw frozen bars at room temperature for best texture.
- → Why do my brownies turn out cakey instead of fudgy?
-
Overmixing the brownie batter develops too much gluten, leading to a cakey texture. Fold ingredients just until combined. Also, avoid overbaking—remove from the oven when a toothpick shows moist crumbs rather than coming out clean.
- → Can I use different types of chocolate chips?
-
Absolutely. Semisweet chips provide balanced sweetness, but milk chocolate makes them sweeter, dark chocolate adds depth, or mix different varieties. You can also add chopped walnuts or pecans for crunch.
- → How do I know when they're done baking?
-
The top should be golden and set. Insert a toothpick in the center—it should come out with moist crumbs but not wet batter. The bars continue firming as they cool, so slightly underbaked is better than overbaked for fudgy results.
- → Can I double this recipe for a larger pan?
-
Yes, double all ingredients and use a 9x13-inch pan. Bake time may increase slightly to 38-42 minutes. Check for doneness at the original time and continue baking if needed.
- → Should I cool them completely before cutting?
-
Yes, cooling completely in the pan ensures clean slices. Warm bars tend to crumble and lose their shape. The cooling time allows both layers to set properly. If you must cut while warm, refrigerate for 30 minutes first.