 Pin it
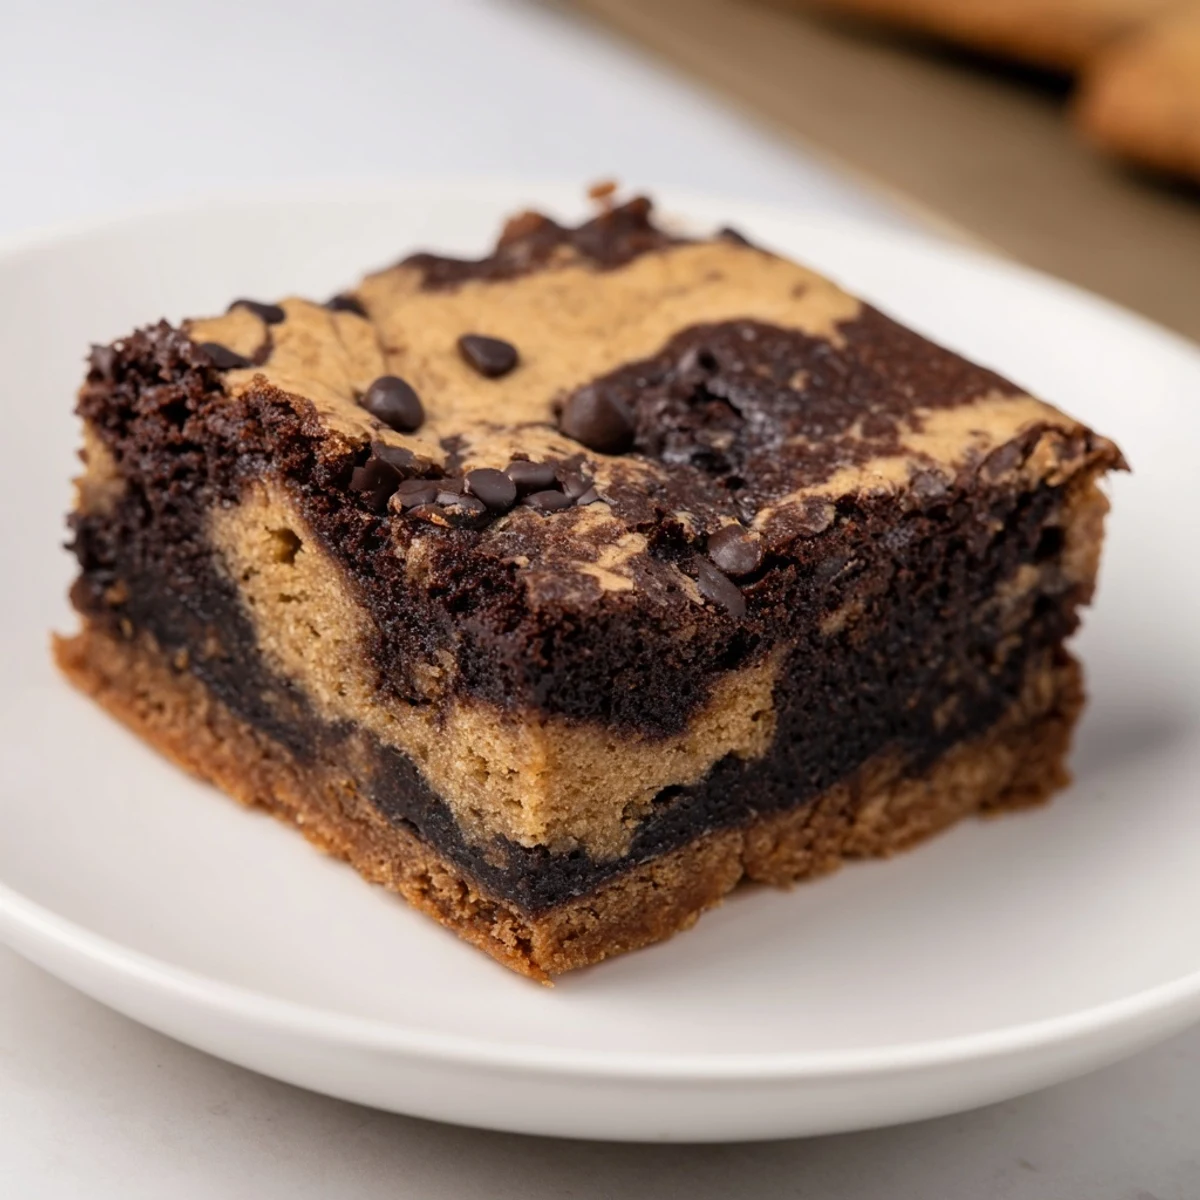
 These incredible bars deliver the best of both worlds with a dense, fudgy dark chocolate base and a chewy cookie dough topping studded with semi-sweet chips. The dual-layer technique creates a marbled masterpiece that's perfectly balanced—neither too rich nor too sweet.
What makes these special is the textural contrast: the bottom layer stays moist and dense while the top bakes up golden with slightly crispy edges. Each square offers three distinct chocolate experiences from the dark chocolate base to the milk chocolate chips.
The process involves layering the batters rather than fully mixing them, creating beautiful swirls as they bake. For the ultimate fudgy texture, slightly underbake and let cool overnight—the texture improves as the flavors meld together.
The first time I made browkies was actually by accident during a heated debate with my roommate about whether brownies or chocolate chip cookies were superior. We ended up making both layers, ran out of pans, and just shoved them together. The result was so devastatingly good that neither of us could go back to regular brownies again.
I brought a batch to my sister's book club last month, and there was actual silence when everyone took their first bite. One of her friends asked for the recipe three times because she could not believe these came from her own kitchen. Now they are the most requested thing at every family gathering.
Ingredients
- 115 g (1/2 cup) unsalted butter: Using room temperature butter for the cookie layer creates that perfect chew, while melted butter in the brownie layer keeps it fudgy
- 175 g (1 cup) dark chocolate, chopped: I prefer 60-70% cocoa for depth, but milk chocolate works if you have a serious sweet tooth
- 150 g (3/4 cup) granulated sugar: This amount hits the sweet spot without overpowering the chocolate flavor
- 2 large eggs: Room temperature eggs incorporate better and prevent that weird eggy layer that sometimes forms on top
- 1 tsp vanilla extract: Pure vanilla makes such a difference here since the flavor really shines through
- 60 g (1/2 cup) all-purpose flour: Do not overmix or your brownie layer will become cakey instead of dense
- 1/4 tsp salt: Just enough to make the chocolate sing without tasting salty
- 85 g (6 tbsp) unsalted butter, softened: This needs to be genuinely soft to cream properly with the sugars
- 75 g (1/3 cup) brown sugar: Dark brown sugar adds moisture and that gorgeous caramel note
- 50 g (1/4 cup) granulated sugar: The combo of both sugars creates the perfect texture variation
- 1 large egg yolk: Using just the yolk adds richness without making the cookie layer too wet
- 110 g (3/4 cup + 1 tbsp) all-purpose flour: Measure carefully since too much flour will make the cookie layer tough
- 1/2 tsp baking soda: This gives the cookie layer just enough lift to stay chewy rather than dense
- 90 g (1/2 cup) semi-sweet chocolate chips: Fold these in gently so they do not break up too much
Instructions
- Get your oven and pan ready:
- Preheat to 175°C (350°F) and line a 20 cm (8-inch) square pan with parchment, leaving those overhangs like handles for easy lifting later
- Melt together the butter and chocolate:
- Use a heatproof bowl over simmering water or microwave in 30 second bursts, stirring until completely smooth and glossy
- Build the brownie base:
- Whisk in the sugar until dissolved, then beat in eggs one at a time, followed by vanilla, and finally fold in flour and salt just until no streaks remain
- Spread the brownie layer:
- Use an offset spatula or the back of a spoon to create an even base layer, reaching into all the corners
- Cream the cookie dough butter:
- Beat softened butter with both sugars for 2-3 minutes until the mixture is pale and fluffy, which creates those tender cookies
- Add the yolk and vanilla:
- Mix until combined, then stir in flour, baking soda, and salt just until the dough comes together
- Fold in the chocolate chips:
- Use a spatula to distribute them evenly without overworking the dough
- Layer the cookie dough:
- Drop spoonfuls over the brownie batter and gently swirl with a knife or spatula for that marbled masterpiece look
- Bake until just set:
- Check at 32 minutes and keep going up to 36 if needed until golden with moist crumbs on a toothpick
- Cool completely before slicing:
- This is the hardest part but essential for clean edges and the best texture
 Pin it
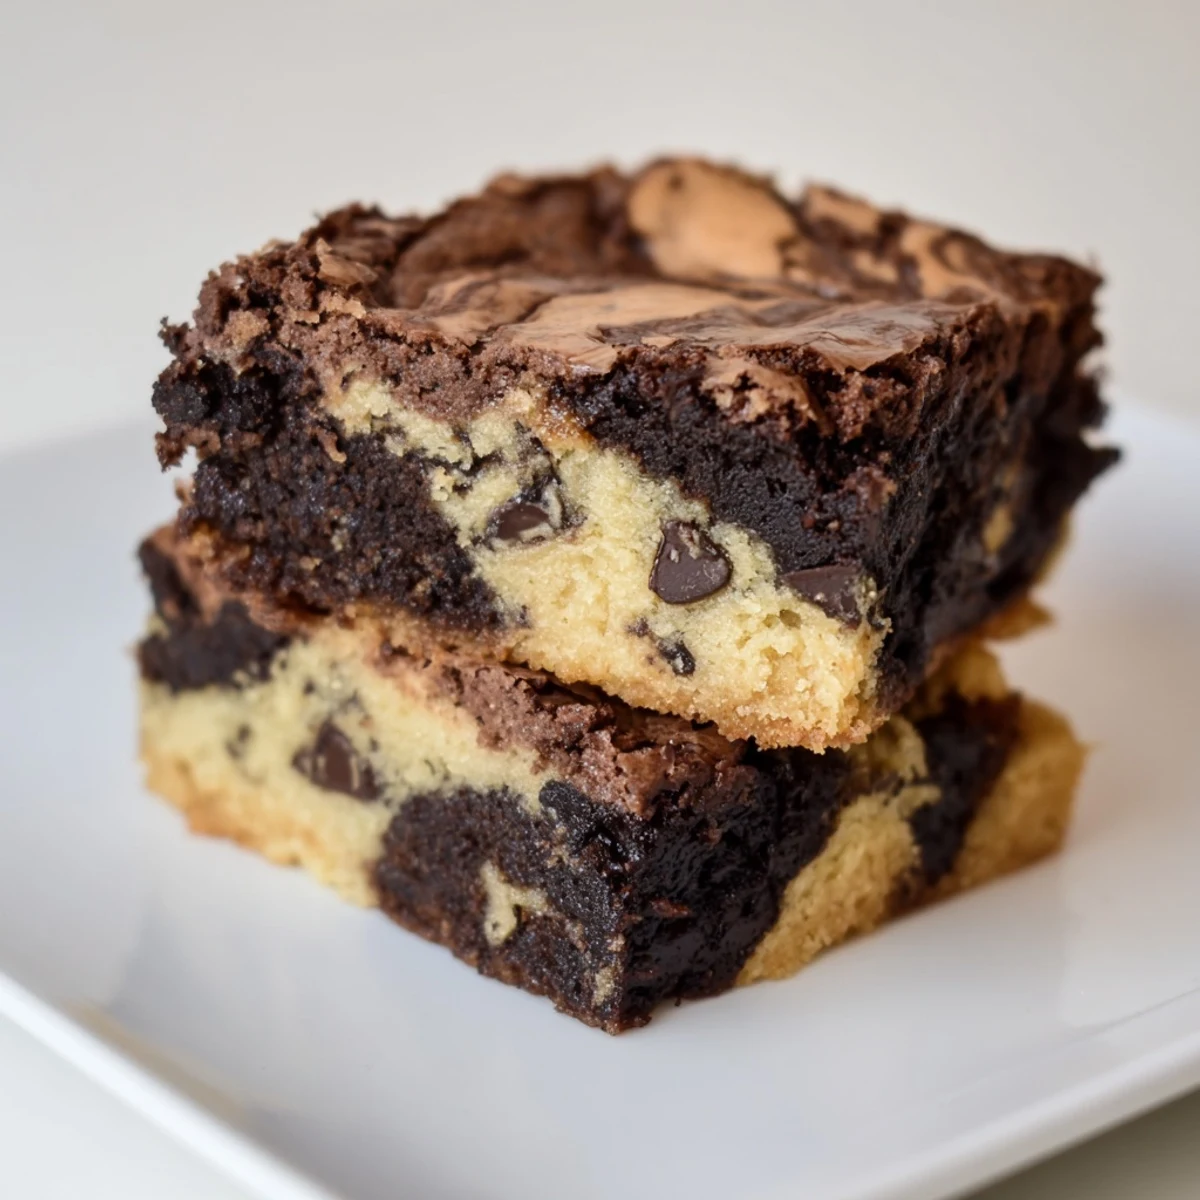
 My daughter now requests these for every school bake sale because teachers apparently fight over them in the break room. There is something about that dual texture that just makes people happy.
Getting The Marble Effect Right
The trick is not to over-swirl the layers together. A few gentle figure-eights with a knife or spatula gives you those beautiful distinct ribbons of brownie and cookie dough. Too much mixing just muddles the flavors and you lose that magic contrast.
Storage And Freezing
These keep remarkably well in an airtight container for up to four days, and somehow the flavors develop even more depth overnight. I also wrap individual squares in plastic and freeze them for emergency dessert cravings.
Serving Suggestions
Aslight warming in the microwave transforms these into something completely irresistible, especially with a scoop of vanilla ice cream melting into all those crevices. I have also been known to crumble them over vanilla pudding for a quick dessert parfait.
- Dust with powdered sugar right before serving for a bakery finish
- Serve with cold milk or hot coffee depending on the weather
- Cut them into smaller squares for parties since these are quite rich
 Pin it
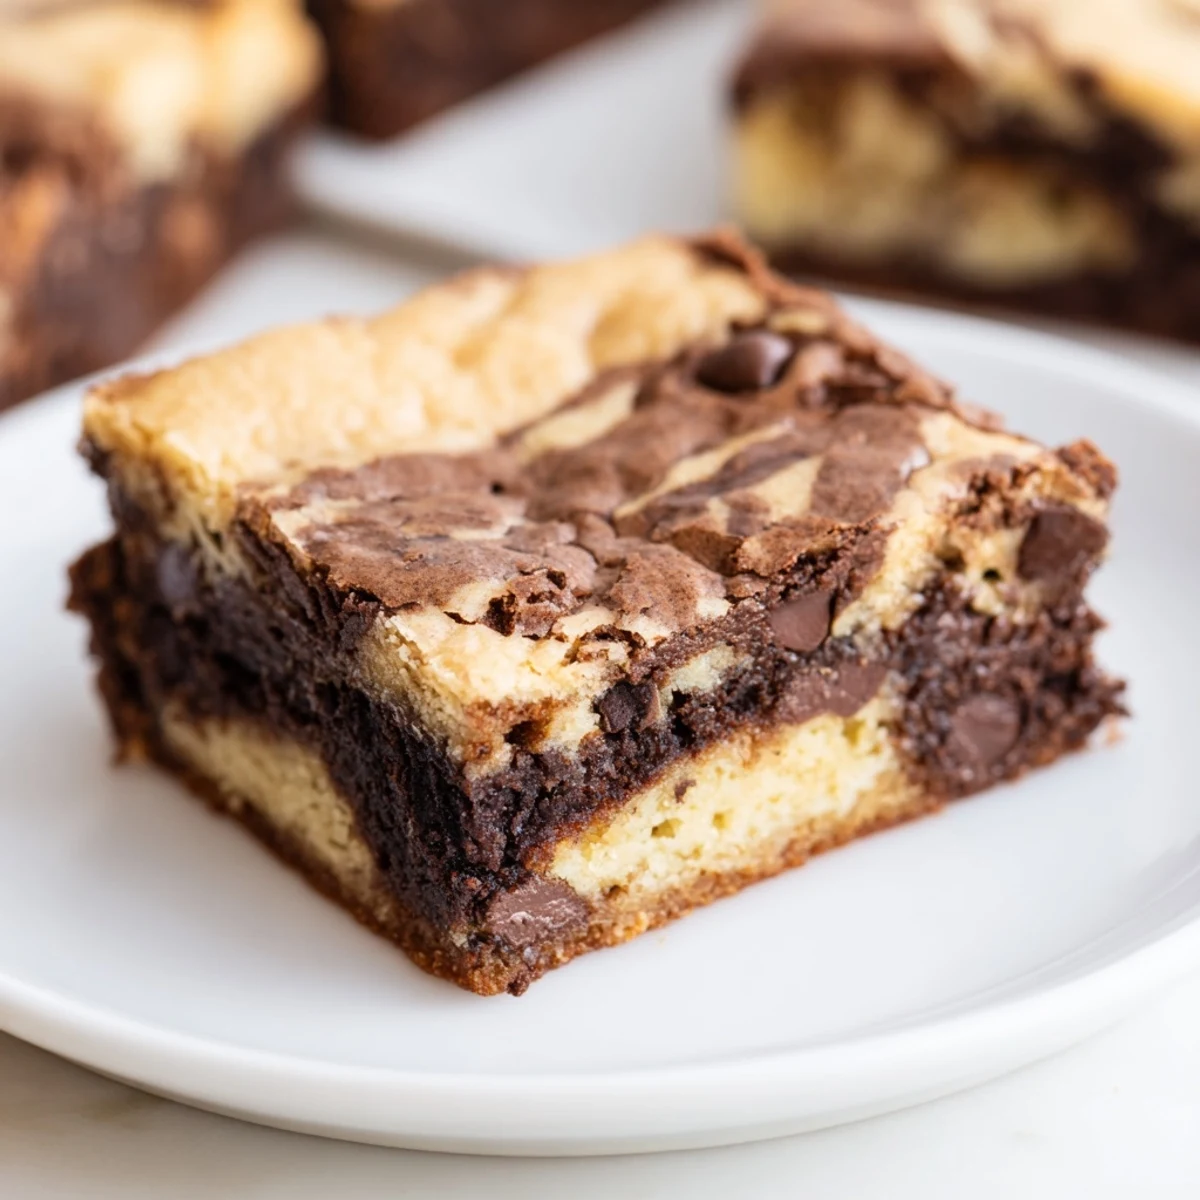
 There is nothing quite like pulling a warm batch from the oven and seeing that marbled top, knowing exactly what kind of magic awaits inside each square.
Recipe Q&A
- → What exactly are browkies?
-
Browkies are a hybrid dessert combining brownies and cookies in one bar. The bottom layer features a dense, fudgy dark chocolate brownie base, while the top layer is chewy chocolate chip cookie dough. The two layers bake together, creating a marbled effect with contrasting textures and rich chocolate flavor throughout.
- → How do I know when browkies are done baking?
-
Insert a toothpick into the center—it should come out with moist crumbs rather than clean batter. The top should appear golden and set, though the center may still look slightly underdone. The bars continue cooking as they cool, so removing them at this stage ensures a fudgy texture rather than dry.
- → Can I make these ahead of time?
-
Absolutely. In fact, these taste better after resting overnight. The flavors meld and the texture becomes more fudgy. Store in an airtight container at room temperature for up to 3 days, or refrigerate for up to a week. For longer storage, wrap well and freeze for up to 3 months.
- → Why do I need to cool completely before cutting?
-
Hot browkies are fragile and will fall apart when sliced. Cooling allows the chocolate to set and the structure to firm up. Cooling overnight in the pan makes cutting cleaner and easier, resulting in neatly defined squares with clean edges rather than crumbly pieces.
- → Can I add mix-ins to the batter?
-
Yes! Walnuts, pecans, or toasted hazelnuts add wonderful crunch to either layer. You can also swirl in peanut butter, add white chocolate chips, or incorporate crushed Oreos into the cookie dough. Just keep additions to about 1/2 cup per layer to maintain proper texture.
- → What's the best way to get clean cuts?
-
For perfect squares, chill the completely cooled bars in the refrigerator for 1-2 hours before cutting. Use a sharp knife cleaned with hot water between cuts. Lift the entire block out using the parchment paper overhang, then cut on a cutting board for even pressure.