 Pin it
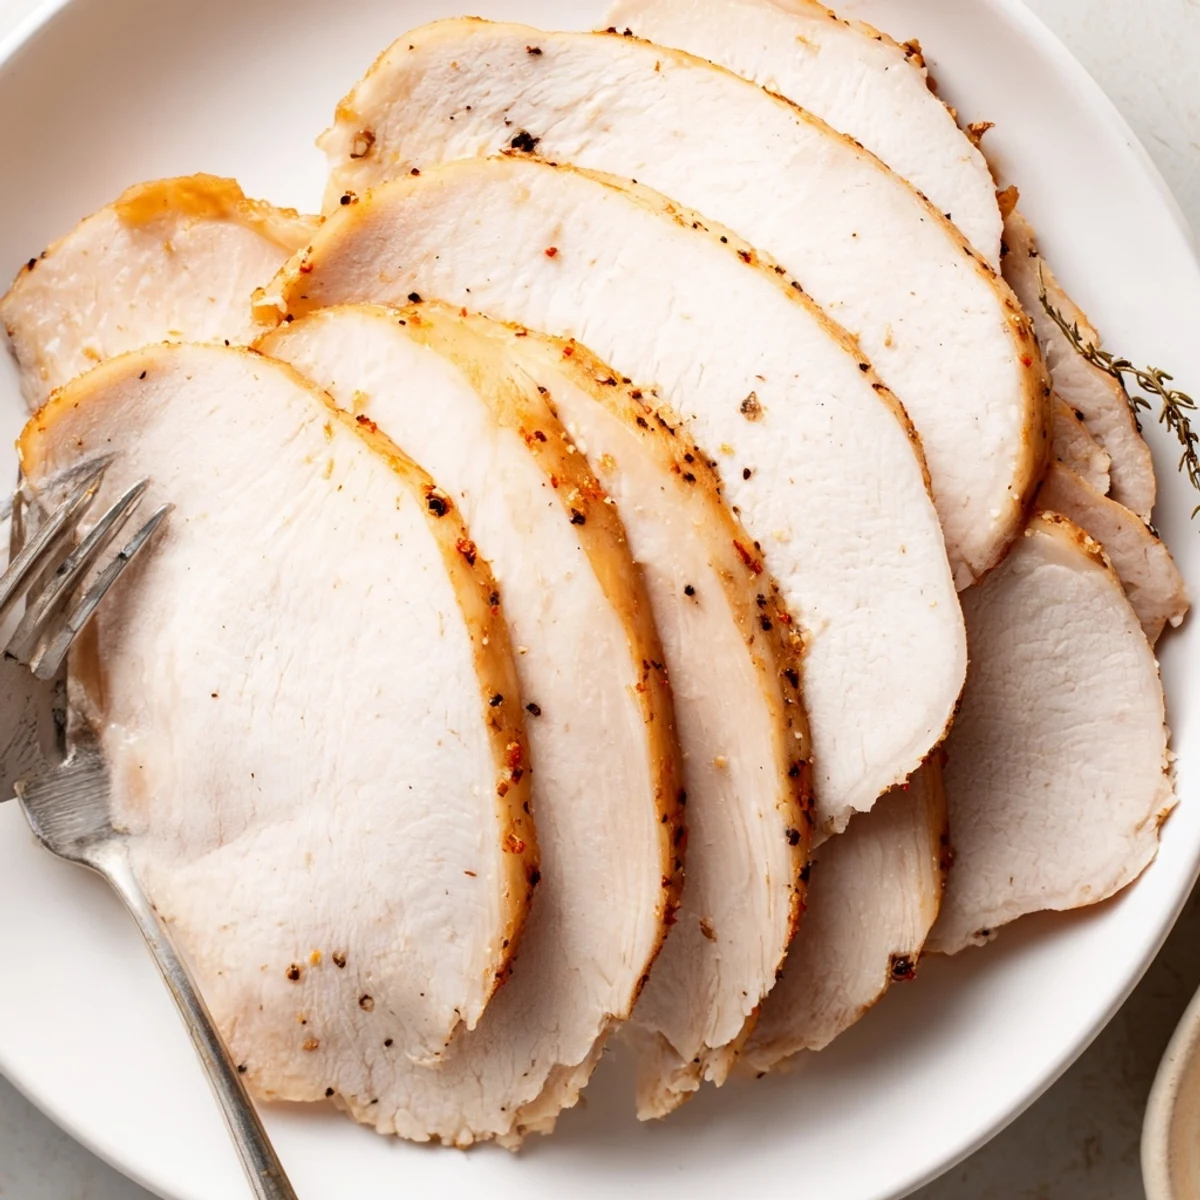
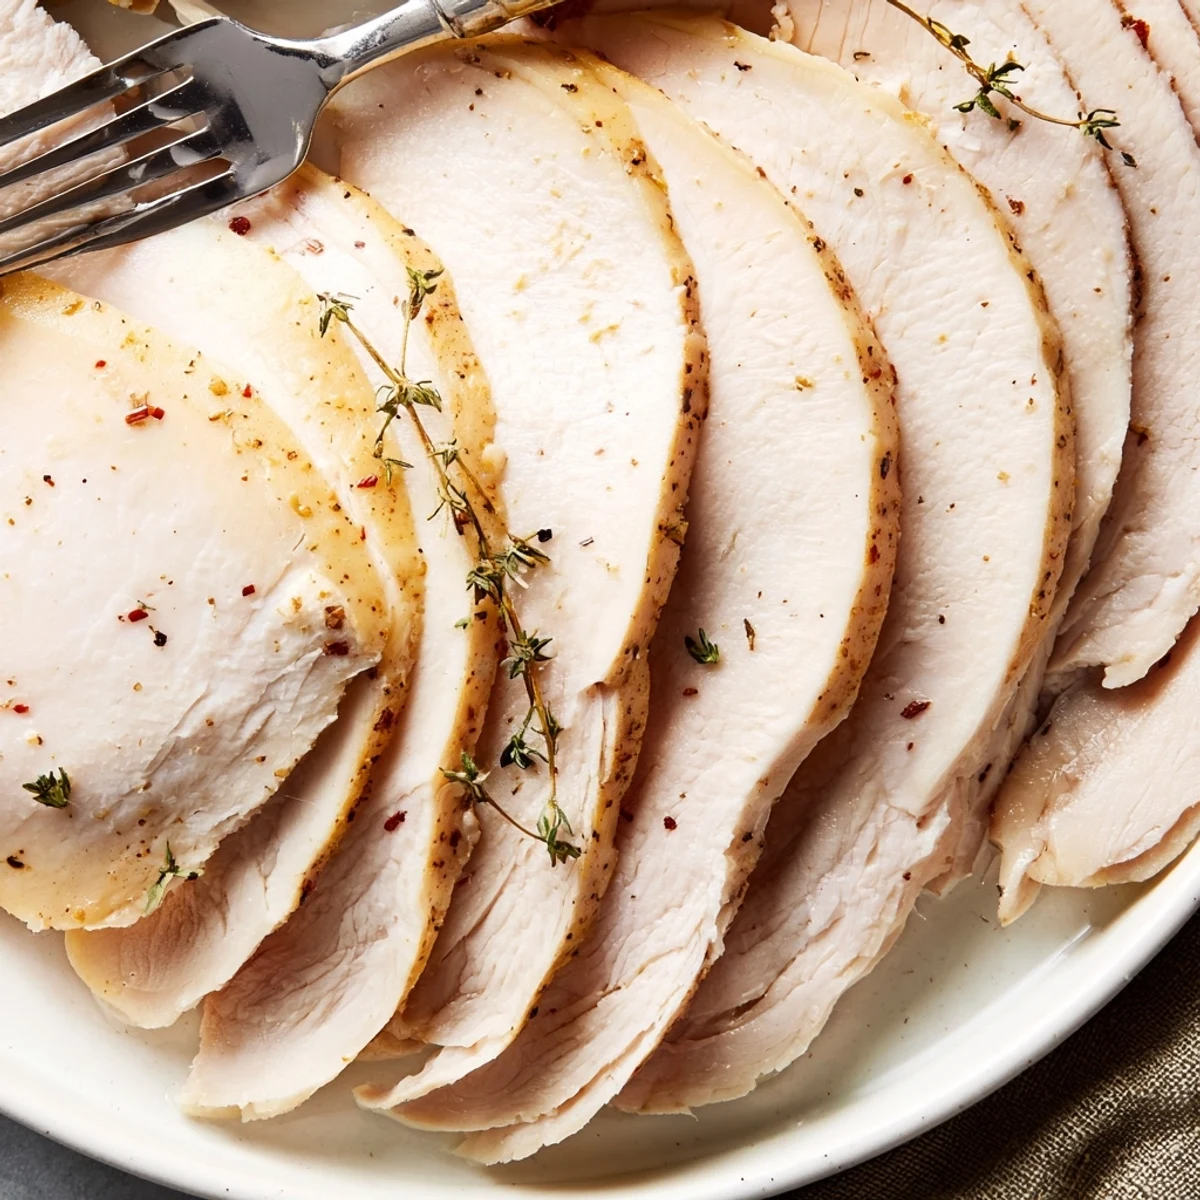
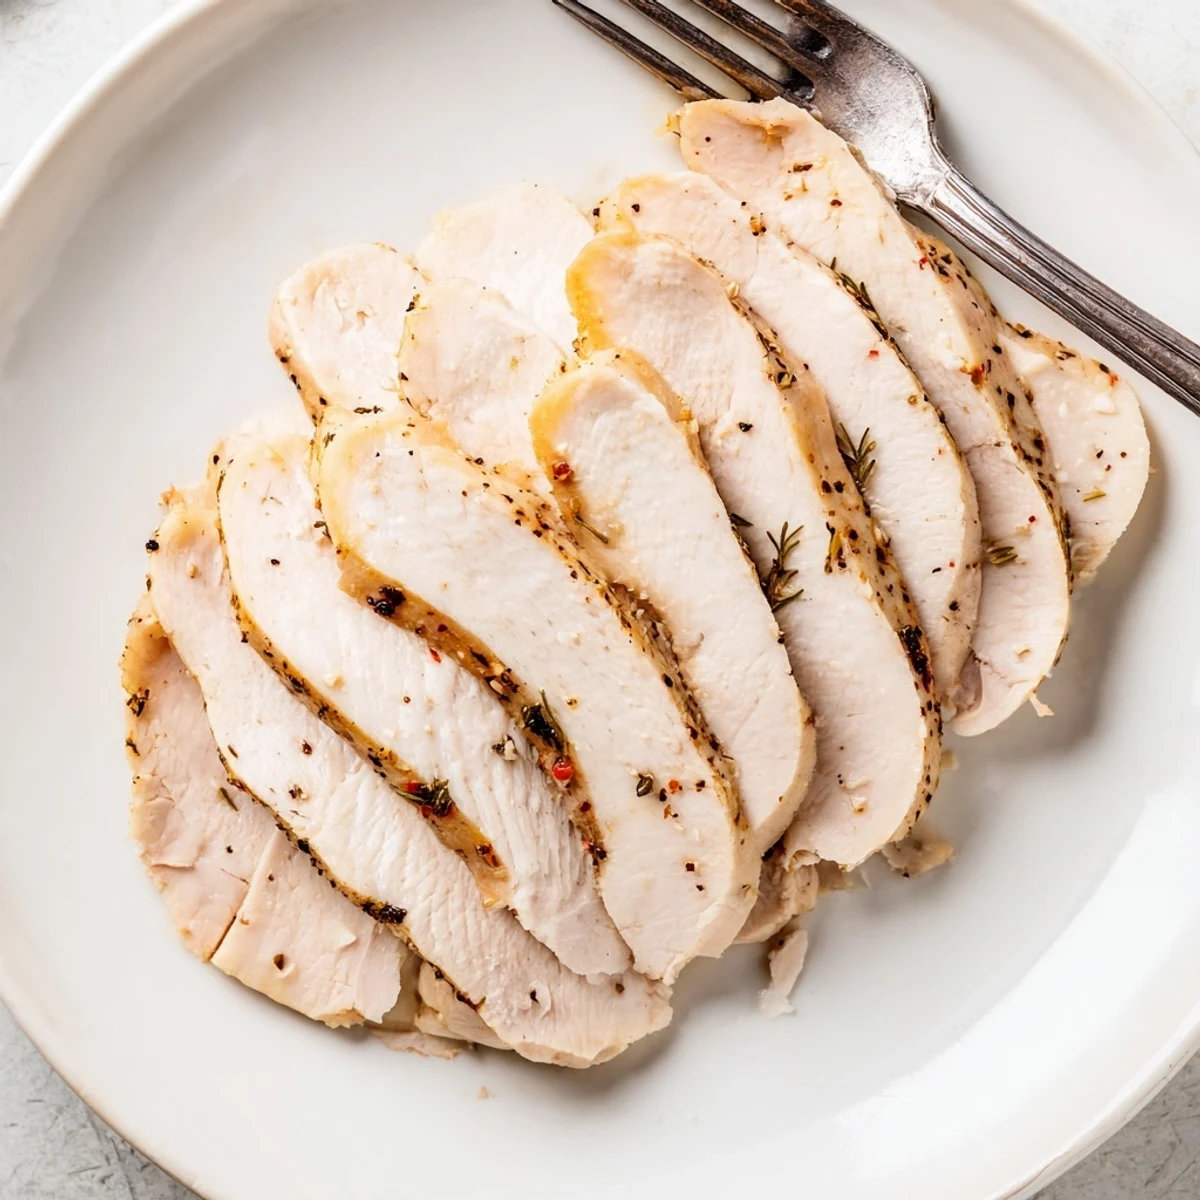
 This brined, seasoned chicken or turkey is rubbed with spices, rolled tight in parchment and foil, then roasted low until 72°C (162°F). After a 4–8 hour brine and a gentle hour in the oven, chill thoroughly (preferably overnight) to set the texture. Slice paper-thin for sandwiches, salads or charcuterie; swap herbs and paprika to vary the flavor.
The fluorescent lights of the deli counter always made me feel a little sad, watching those pale, perfectly uniform slices get stacked between bread. One Tuesday evening, standing in my kitchen with a package of store bought turkey that tasted like disappointment and salt, I decided I was done with it. I pulled out a chicken breast, some parchment paper, and a stubborn determination to make something better. That first batch changed every sandwich I have eaten since.
My friend Rachel came over for lunch the week after I perfected this recipe, and she stood in my kitchen holding a sandwich with both hands, mid bite, refusing to speak until she finished chewing. She looked at me with wide eyes and said absolutely nothing for a full thirty seconds, which is the highest compliment a quiet person can give. Then she asked for seconds and a container to take home.
Ingredients
- 1 kg (2.2 lbs) boneless, skinless chicken breast or turkey breast: Go for the freshest poultry you can find, and try to get pieces that are roughly even in thickness so they cook uniformly.
- 1 L (4 cups) cold water: Cold water helps the brine penetrate the meat gently without starting any premature cooking.
- 1 1/2 tbsp kosher salt: Kosher salt dissolves cleanly and seasons evenly, do not substitute table salt without adjusting the amount down.
- 1 tbsp sugar: A little sweetness balances the salt and helps develop a lovely golden color during roasting.
- 1 tsp black pepper: Freshly ground if you have it, the pre ground stuff works fine but loses its punch over time.
- 1 tsp garlic powder: This creates a savory base note that permeates every single slice.
- 1 tsp onion powder: Paired with the garlic, it gives the meat that familiar deli flavor without being overpowering.
- 1/2 tsp smoked paprika (optional): This adds a whisper of smokiness that makes people wonder what your secret is.
- 1/2 tsp dried thyme: Thyme and poultry are old friends, and even a small amount adds an herbal warmth that ties everything together.
Instructions
- Create the brine:
- Stir the cold water, kosher salt, and sugar together in a large bowl until you cannot see or feel any granules left at the bottom, which usually takes about a minute of patient stirring.
- Let it soak:
- Submerge the chicken or turkey breast completely in the brine, cover the bowl, and tuck it into the refrigerator for at least four hours or up to eight, letting the salt work its magic on the proteins.
- Preheat the oven:
- Set your oven to 160 degrees Celsius (325 degrees Fahrenheit) and give it a good fifteen minutes to reach temperature while you prepare the meat.
- Dry and season:
- Pull the meat from the brine and pat it thoroughly dry with paper towels, then sprinkle the black pepper, garlic powder, onion powder, smoked paprika, and thyme all over the surface, rubbing gently with your fingertips to press the seasonings into every side.
- Roll it tight:
- Lay the seasoned meat on a sheet of parchment paper and roll it into a tight cylinder, then wrap that bundle securely in aluminum foil, twisting the ends firmly so it holds its shape like a tidy log.
- Set up for roasting:
- Place the wrapped meat on a wire rack set over a baking sheet, which allows air to circulate underneath and cooks the meat evenly all the way around.
- Roast low and slow:
- Slide the whole setup into the oven and roast for about one hour, checking with a meat thermometer near the end until it reads 72 degrees Celsius (162 degrees Fahrenheit) at the thickest point.
- Cool completely before slicing:
- Take it out of the oven and resist every urge to cut into it right away, letting it cool to room temperature and then chilling it in the refrigerator, preferably overnight, so the texture firms up into perfect sliceable layers.
 Pin it
 There is something deeply satisfying about opening the fridge and seeing a homemade log of deli meat sitting there next to the mustard and lettuce, knowing exactly what went into it. It turns an ordinary Tuesday lunch into something that feels intentional and cared for.
Getting the Slices Just Right
A sharp knife makes all the difference here, and I learned after several jagged attempts that letting the meat chill overnight transforms it from a shredding mess into something you can cut paper thin. Use a gentle sawing motion rather than pressing down hard, and rotate the log as you go to keep the rounds even.
Mixing Up the Seasonings
The smoked paprika and thyme combination is my default, but one weekend I ran out of both and used rosemary and a pinch of coriander instead, which produced an entirely different and equally delicious result. Think of the seasoning blend as a suggestion rather than a rule, and let your own pantry and preferences guide you.
Keeping It Fresh and Useful
This deli meat stays good in the refrigerator for up to five days, though it rarely lasts that long in my house, and the flavor is best on day two after everything has had time to settle. Beyond sandwiches, try laying slices over a salad, tucking them into a wrap, or arranging them on a quick charcuterie board when friends drop by unexpectedly.
- Always store the sliced meat in an airtight container with a layer of parchment between the slices to prevent sticking.
- Wholegrain mustard or a simple homemade aioli are the best companions I have found for bringing out the flavor.
- Check your spices for hidden allergens if you are serving this to anyone with sensitivities, as some blends contain trace ingredients you might not expect.
 Pin it
 Once you have made your own deli meat, going back to the packaged stuff feels like settling for a postcard when you could have the real view. Your sandwiches deserve this, and so do you.
Recipe Q&A
- → How long should I brine the meat?
-
Brine the breast for 4–8 hours in the refrigerator. Four hours gives mild seasoning and moisture; up to eight hours yields deeper flavor and juiciness without becoming overly salty.
- → What internal temperature indicates doneness?
-
Roast until the center reaches 72°C (162°F). Use an instant-read thermometer inserted into the thickest part to ensure safe, even cooking without drying out the meat.
- → Can I use turkey instead of chicken?
-
Yes. Both boneless chicken and turkey breasts work well with the brine and low roast method; adjust resting time as needed and slice thinly after chilling for best texture.
- → Why wrap in parchment and foil?
-
Rolling in parchment and wrapping in foil creates a compact log that steams gently and keeps juices in. It helps produce a uniform shape for thin, even slices and prevents surface drying.
- → How thin should I slice the meat?
-
Chill the cooked log until firm (overnight is ideal), then use a sharp slicing knife to cut paper-thin slices. Thin cuts yield the best mouthfeel for sandwiches and charcuterie.
- → How long will the cooked meat keep in the fridge?
-
Store tightly wrapped or in an airtight container in the refrigerator for up to 5 days. Keep slices chilled and discard if texture or smell changes.
- → How can I vary the flavor?
-
Swap or add spices such as rosemary, coriander, or smoked paprika (optional) and adjust garlic or onion powder to taste. Small changes in herbs create distinct profiles without altering technique.