Pin it
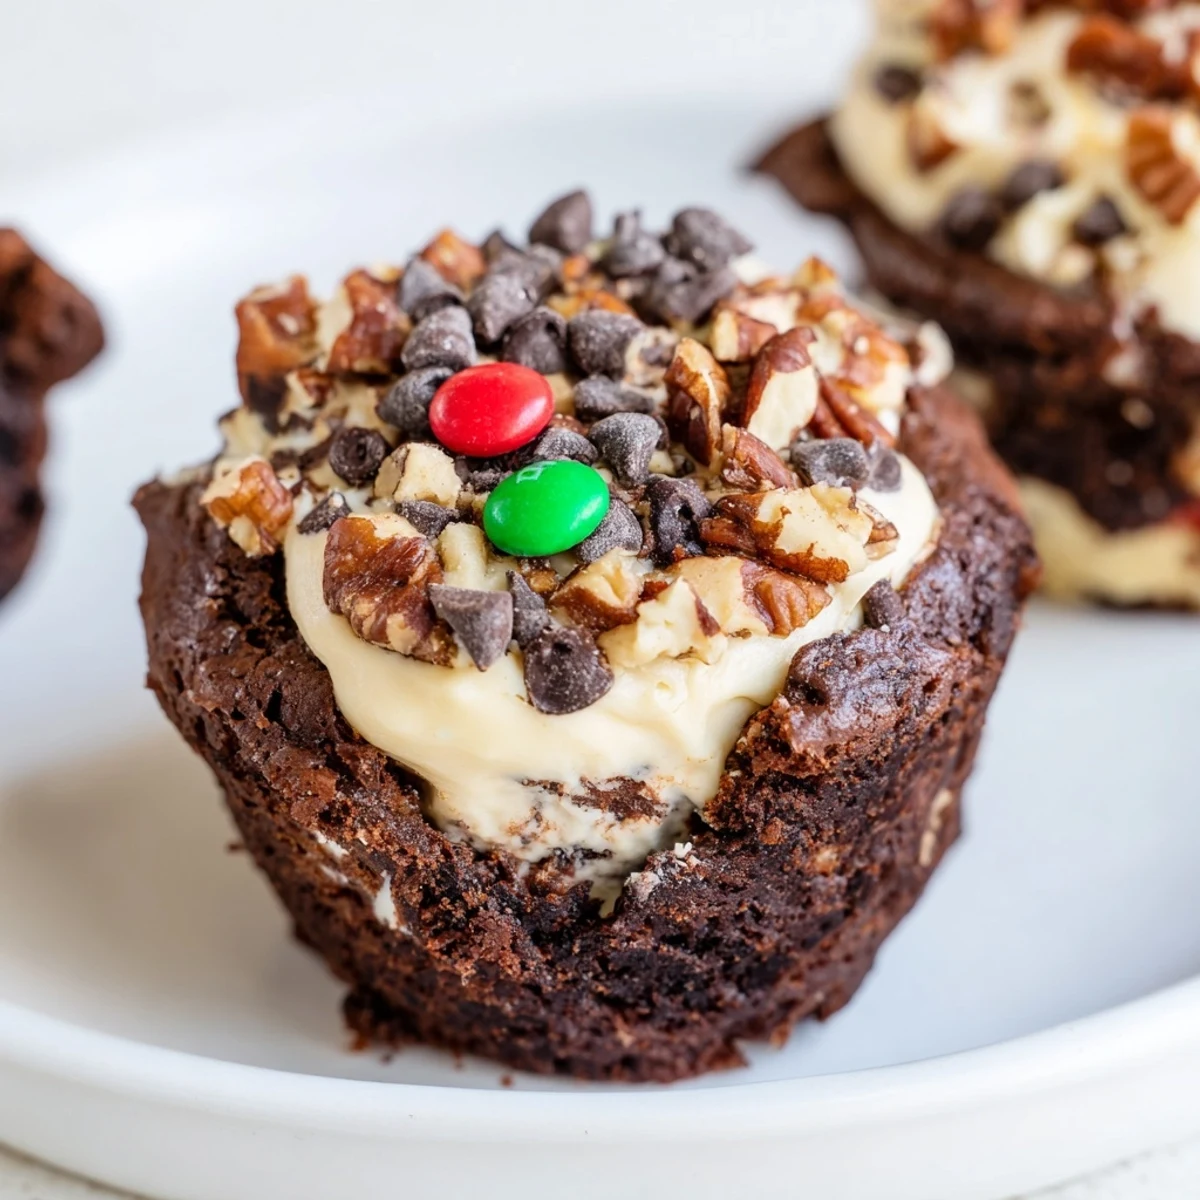
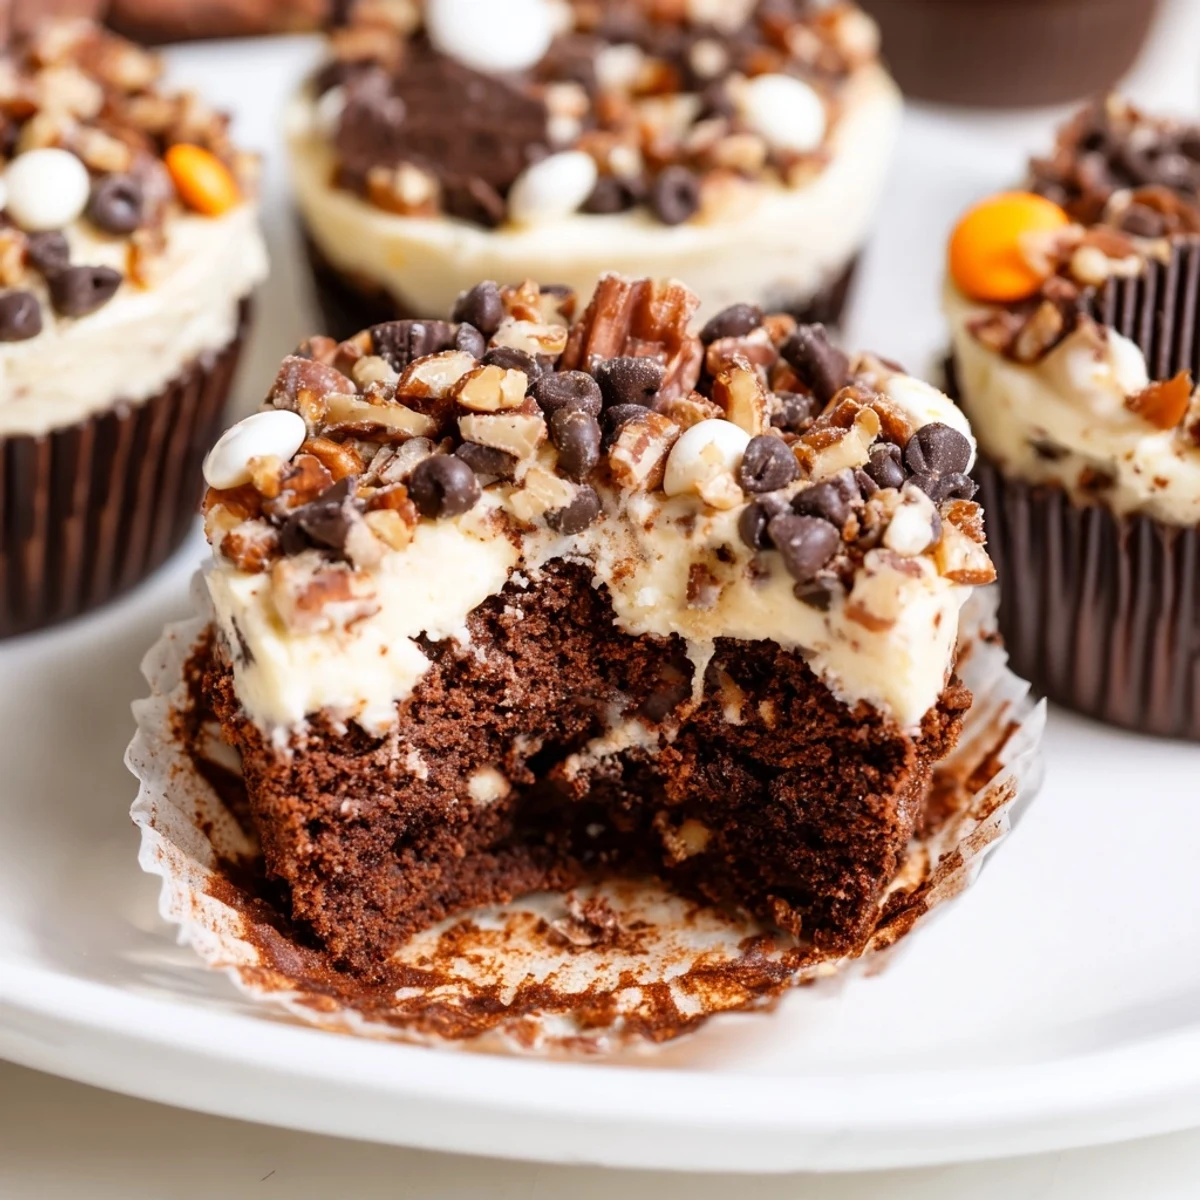
 These impressive individual desserts feature a rich, fudgy brownie base topped with smooth vanilla cheesecake filling. The crowning glory comes from generous layers of loaded toppings—crunchy pecans, mini chocolate chips, crushed Oreos, and colorful M&Ms create an irresistible combination. Each cup delivers the perfect balance of chocolate intensity and creamy tanginess, finished with varied textures and sweetness. The muffin tin format makes portioning effortless and presentation stunning.
The first time I made these, my roommate walked into the kitchen and actually gasped. There's something about that brownie-cheesecake combo that stops people in their tracks. I'd been experimenting with two-bite desserts for a party, trying to figure out how to get maximum flavor into minimal space. When these came out of the oven with all those toppings melting together, I knew I'd stumbled onto something dangerous.
I made these for my sister's birthday last year instead of a traditional cake, and honestly? It was a game changer. Everyone got their own personal dessert, loaded exactly how they wanted it. My niece picked all the M&M cups, while my dad went straight for the pecan ones. Watching people claim their favorites became part of the fun.
Ingredients
- 120 g (1/2 cup) unsalted butter: Melted until just warm, not hot—you don't want to cook the eggs when you mix them in
- 150 g (3/4 cup) granulated sugar: Creates that crackly, shiny top on the brownie layer when whipped with the butter
- 75 g (1/2 cup + 1 tbsp) brown sugar: Adds moisture and a subtle molasses depth that balances the cocoa
- 2 large eggs: Room temperature eggs incorporate better and give you that glossy, rich texture
- 1 tsp vanilla extract: Don't skip this—vanilla is the bridge that connects chocolate and cheesecake flavors
- 65 g (3/4 cup) unsweetened cocoa powder: Use Dutch-processed if you can find it for smoother, less bitter chocolate flavor
- 65 g (1/2 cup) all-purpose flour: Just enough structure to hold everything together without becoming cakey
- 1/2 tsp salt: Crucial for making the chocolate taste more like itself
- 225 g (8 oz) cream cheese: Absolutely must be softened—cold cream cheese creates lumps that ruin the silky texture
- 60 g (1/4 cup) granulated sugar: Sweetens the cheesecake layer without making it cloying
- 1 large egg: Binds the cheesecake filling and gives it structure as it bakes
- 60 g (1/3 cup) mini chocolate chips: Mini chips distribute evenly and don't sink through the layers
- 60 g (1/3 cup) chopped pecans or walnuts: Toast them for 5 minutes beforehand if you want extra nutty flavor
- 60 g (1/3 cup) crushed Oreos: I pulse them in the food processor so no piece is too big to bite through comfortably
- 60 g (1/3 cup) mini M&Ms: These hold their shape better than regular chocolate chips during baking
Instructions
- Get your oven and pan ready:
- Preheat to 175°C (350°F) and line a 12-cup muffin tin—paper liners make removal effortless and look prettier for serving.
- Make the brownie base:
- Melt butter in a medium bowl, then whisk in both sugars until glossy and combined. Add eggs and vanilla, mixing until smooth.
- Add the dry ingredients:
- Sift in cocoa, flour, and salt, then stir gently until just combined—overmixing makes tough brownies.
- Layer the batter:
- Divide brownie batter among muffin cups (about 1 heaping tablespoon each), pressing gently to flatten slightly.
- Prepare the cheesecake:
- Beat softened cream cheese until smooth, then add sugar, egg, and vanilla, mixing until creamy and lump-free.
- Add the cheesecake layer:
- Spoon about 1 tablespoon of cheesecake filling over each brownie base, smoothing tops gently with the back of the spoon.
- Load on the toppings:
- Sprinkle each cup generously with whatever combination calls to you—chocolate chips, nuts, Oreos, M&Ms, or all of the above.
- Bake until set:
- Bake 22–25 minutes until cheesecake is set and brownie edges are firm, but centers still have a slight jiggle.
- Cool completely:
- Let cool in the pan 10 minutes, then transfer to a wire rack. Chill at least 1 hour before serving for clean cuts and best texture.
 Pin it
 My friend Sarah texted me at midnight the first time she tried these, demanding the recipe. She said she'd eaten three in the car on the way home from the party. That's when I realized these aren't just dessert—they're the kind of thing people hide in the back of the fridge for themselves.
Mixing Your Toppings
I've learned that the best approach is letting people build their own, especially for parties. Set up bowls with different toppings and let guests customize before baking. Last time I did this, someone created a monstrosity with everything on it that actually worked beautifully. The key is pressing toppings gently into the cheesecake layer so they stick but don't sink through.
Texture Secrets
The contrast between layers is what makes these work—the fudgy brownie needs to be slightly underbaked while the cheesecake should be fully set. I've found that checking at 20 minutes is crucial. If the cheesecake is done but brownie seems too fudgy, they actually continue cooking while cooling in the pan. Trust the process.
Make-Ahead Magic
These freeze surprisingly well, which makes them my go-to for unexpected guests or emergency sweet cravings. Wrap each cup individually in plastic, then place in a freezer bag. They thaw in about 30 minutes at room temperature, or you can eat them slightly frozen for an almost ice-cream-like texture.
- Place cups on a baking sheet while freezing first so they keep their shape
- Write the date on the bag—they're best within 3 months but I've eaten them at 6 months with no complaints
- For serving straight from the freezer, let sit 15 minutes before removing the liner to avoid sticking
 Pin it
 These have become my answer to every dessert emergency, from last-minute potlucks to midnight cravings. Something about that brownie-cheesecake combo just works every single time.
Recipe Q&A
- → Can I make these ahead of time?
-
Yes, these cups store beautifully in the refrigerator for up to 5 days. The flavors actually deepen after chilling, making them ideal for preparing a day before your gathering.
- → What other toppings work well?
-
Try peanut butter chips, toffee bits, shredded coconut, crushed pretzels, or fresh berries. The combination possibilities are endless—mix sweet and salty elements for contrast.
- → How do I know when they're done baking?
-
The cheesecake layer should be set with just a slight wobble in the center, and brownie edges should feel firm. A toothpick inserted in the brownie portion should come out with moist crumbs, not wet batter.
- → Can I freeze these cups?
-
Absolutely! Wrap each cup individually in plastic wrap, then freeze in an airtight container for up to 3 months. Thaw overnight in the refrigerator before serving.
- → Why must I chill before serving?
-
Chilling allows the cheesecake layer to fully set and develop proper texture. The cool temperature also enhances the fudgy consistency of the brownie base, creating the optimal eating experience.
- → Can I use a different pan?
-
A mini cheesecake pan or silicone mold works well. Avoid using a standard cupcake pan as these are richer and larger than typical cupcakes—the muffin size provides the ideal ratio of layers.