 Pin it
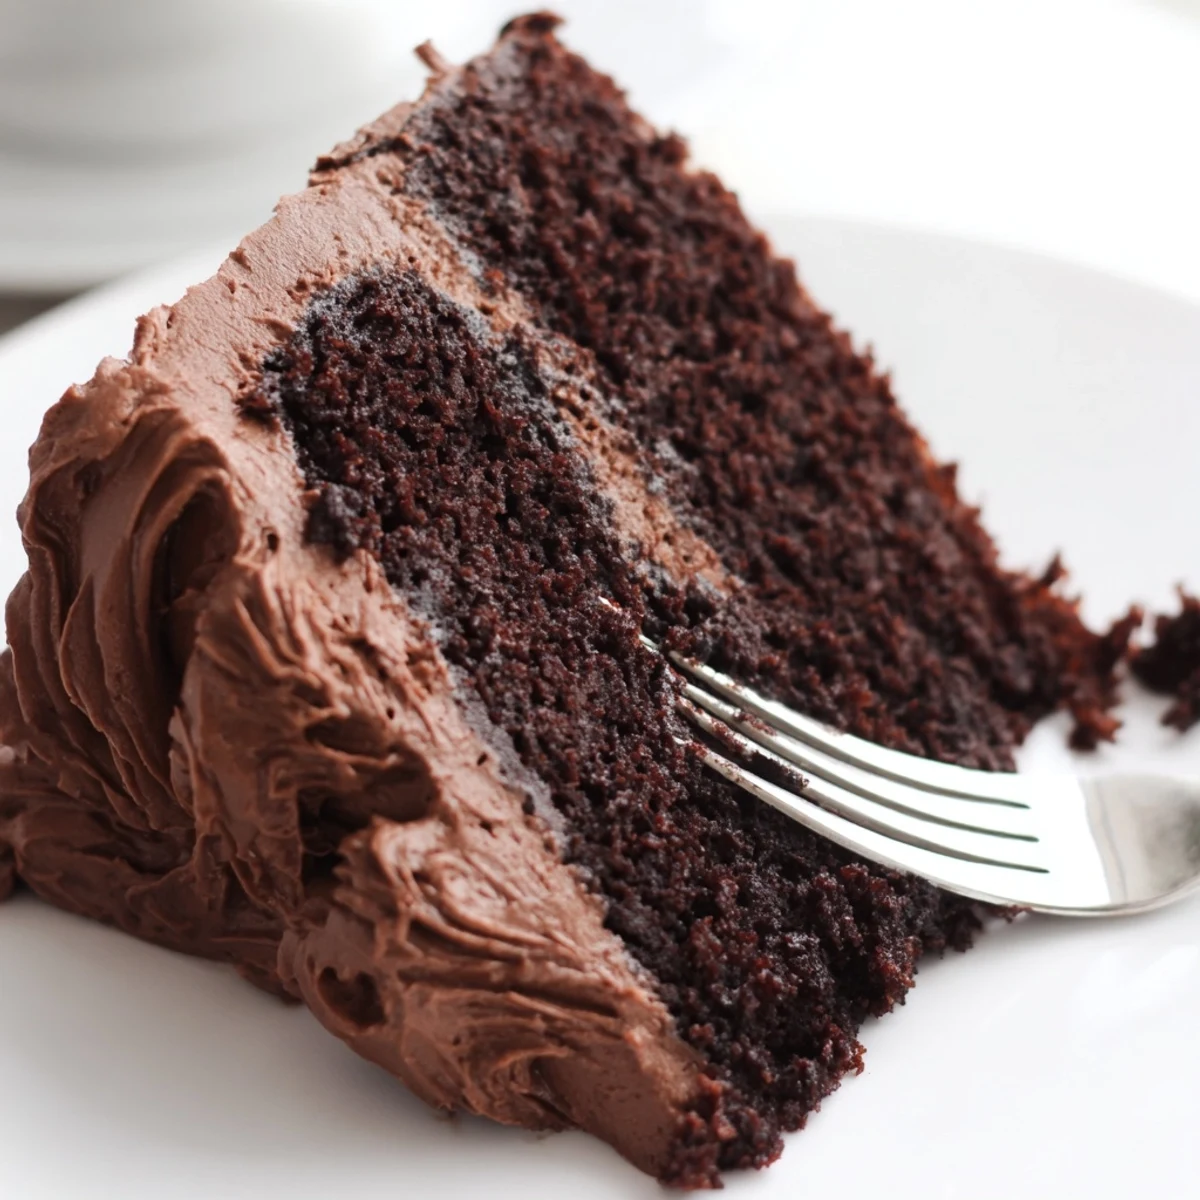
 This indulgent chocolate cake captures the magic of the famous dessert from Matilda. The cake features an incredibly moist crumb achieved by incorporating boiling water into the batter, creating a tender texture that melts in your mouth. The crowning glory is a silky chocolate buttercream frosting that adds the perfect amount of sweetness and richness. With a preparation time of just 25 minutes and 35 minutes in the oven, you'll have a stunning two-layer cake ready to impress at any celebration. The classic swooped frosting technique gives it that recognizable cinematic appeal.
The first time I made this cake, my kitchen smelled like a chocolate shop had exploded in the best possible way. I'd been chasing that movie-magic chocolate cake for years, and when the boiling water hit the cocoa powder, something clicked. The batter looked impossibly thin, almost worrying, but that's exactly what makes it so incredibly moist. Now it's the only chocolate cake recipe I actually keep.
Last summer my sister requested this for her birthday, and I made the mistake of taste-testing the frosting just a little too thoroughly while the layers cooled. Ended up having to whip up a half-batch more at the last minute. Nobody complained about the extra frosting situation. The cake vanished in twenty minutes flat.
Ingredients
- All-purpose flour: The foundation that gives structure to all that chocolate goodness
- Granulated sugar: Sweetens and helps create that tender cake texture we love
- Unsweetened cocoa powder: Use a good quality Dutch process for deeper flavor
- Baking powder and baking soda: The dynamic duo that makes this cake rise beautifully
- Salt: Dont skip it, it makes chocolate taste more like chocolate
- Large eggs: Room temperature eggs blend more easily into the batter
- Whole milk: Adds richness and helps create a moist crumb
- Vegetable oil: Keeps the cake tender for days unlike butter which can firm up
- Pure vanilla extract: Enhances all the chocolate flavors without competing
- Boiling water: The secret ingredient that blooms the cocoa and creates that incredible texture
- Unsalted butter: Room temperature butter creates the silkiest frosting base
- Powdered sugar: Sweetens and thickens the frosting to perfect spreading consistency
Instructions
- Preheat your oven and prepare the pans:
- Set your oven to 175°C and grease two 23 cm round pans, lining the bottoms with parchment paper for easy release later.
- Whisk together the dry ingredients:
- In a large bowl, combine flour, sugar, cocoa powder, baking powder, baking soda, and salt until everything is evenly distributed.
- Add the wet ingredients:
- Pour in eggs, milk, oil, and vanilla, then beat on medium speed until the mixture comes together smoothly.
- Stir in the boiling water:
- Carefully pour in the boiling water and mix gently, the batter will become very thin but trust the process, this is exactly right.
- Bake until perfect:
- Divide batter between your prepared pans and bake for 30 to 35 minutes, checking with a toothpick that comes out clean from the center.
- Cool the cakes completely:
- Let the layers rest in their pans for 10 minutes before turning them out onto wire racks to cool entirely.
- Make the frosting base:
- Beat softened butter until creamy, sift in cocoa powder and mix until no streaks remain.
- Add sweetness and flavor:
- Gradually incorporate powdered sugar alternating with milk until you reach spreadable consistency, then mix in vanilla and salt.
- Assemble your masterpiece:
- Place one cake layer on your serving plate, spread frosting generously, stack the second layer, and cover the top and sides.
- Create those signature swoops:
- Use an offset spatula to create dramatic waves and swirls in the frosting for that classic Matilda inspired finish.
 Pin it
 This recipe has become my go-to for celebrations because it never fails to make people happy. Something about that combination of intense chocolate and tender crumb feels like a hug in cake form. Even friends who claim they don't have much of a sweet tooth end up going back for seconds.
Making It Your Own
Once you've mastered the classic version, try swapping sour cream for half the milk in the cake batter. The slight tang creates such depth of flavor, and the crumb becomes even more luxurious. I discovered this modification during a pandemic baking spree when I was short on milk, and now I actually prefer it.
Getting The frosting Just Right
The frosting consistency can make or break this cake, so pay attention to how it feels as you're mixing. If it's too stiff, add another tablespoon of milk. Too thin? Blend in a bit more powdered sugar. You want it to hold its shape but still glide smoothly across the cake without dragging.
Serving And Storage Tips
This cake actually tastes better the next day as the flavors meld and the frosting softens into the crumb slightly. Store it covered at room temperature for up to three days, though in my house it rarely lasts that long. For longer storage, wrap individual slices and freeze them for those moments when chocolate cake becomes an emergency situation.
- Serve slightly warm with a cold glass of milk for the ultimate comfort experience
- A pinch of espresso powder in the frosting amplifies the chocolate flavor beautifully
- Always bring cold cake to room temperature before serving for the best texture
 Pin it
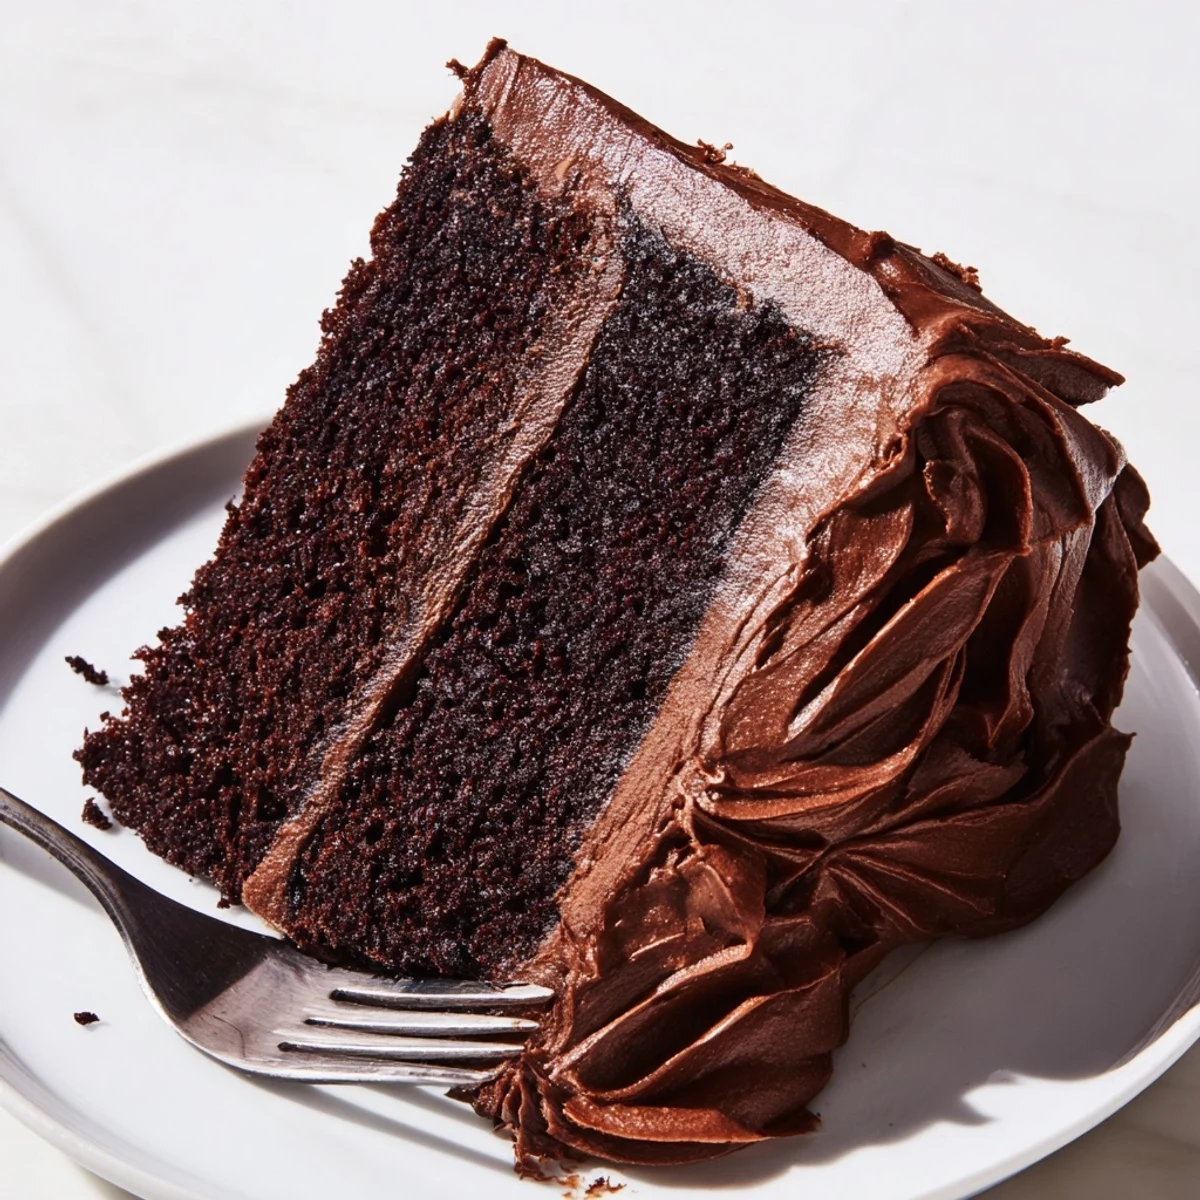
 There's something almost magical about a recipe that comes from fiction but becomes a real kitchen staple in your life. This cake has appeared at birthdays, potlucks, and random Tuesday nights when chocolate cravings struck hard. Hope it brings as much joy to your table as it has to mine.
Recipe Q&A
- → What makes this chocolate cake so moist?
-
The secret ingredient is boiling water, which is carefully mixed into the batter. This technique blooms the cocoa powder and creates an exceptionally moist, tender crumb that stays fresh for days.
- → Can I make this cake in advance?
-
Absolutely. The cake layers can be baked and wrapped in plastic wrap up to two days ahead. Store at room temperature or freeze for up to three months. Frost the cake on the day you plan to serve it.
- → How do I achieve the classic swooped frosting look?
-
Use an offset spatula to create swoops and swirls in the frosting while it's still slightly soft. Work in a circular motion around the cake, varying the pressure to create organic, flowing waves of chocolate.
- → Can I substitute the vegetable oil?
-
Yes, melted butter or coconut oil work well as substitutes. Keep in mind that butter adds a richer flavor while coconut oil adds subtle sweetness. Use the same amount as the vegetable oil called for in the recipe.
- → Why does my batter seem so thin?
-
A thin batter is completely normal and expected for this cake. The boiling water creates a loose consistency, but don't worry—it bakes into a beautifully moist, substantial cake. Trust the process and pour it evenly into your prepared pans.
- → How should I store the finished cake?
-
Store the frosted cake at room temperature in a cake dome or covered with plastic wrap for up to three days. For longer storage, refrigerate for up to a week, though bring to room temperature before serving for the best texture and flavor.