 Pin it
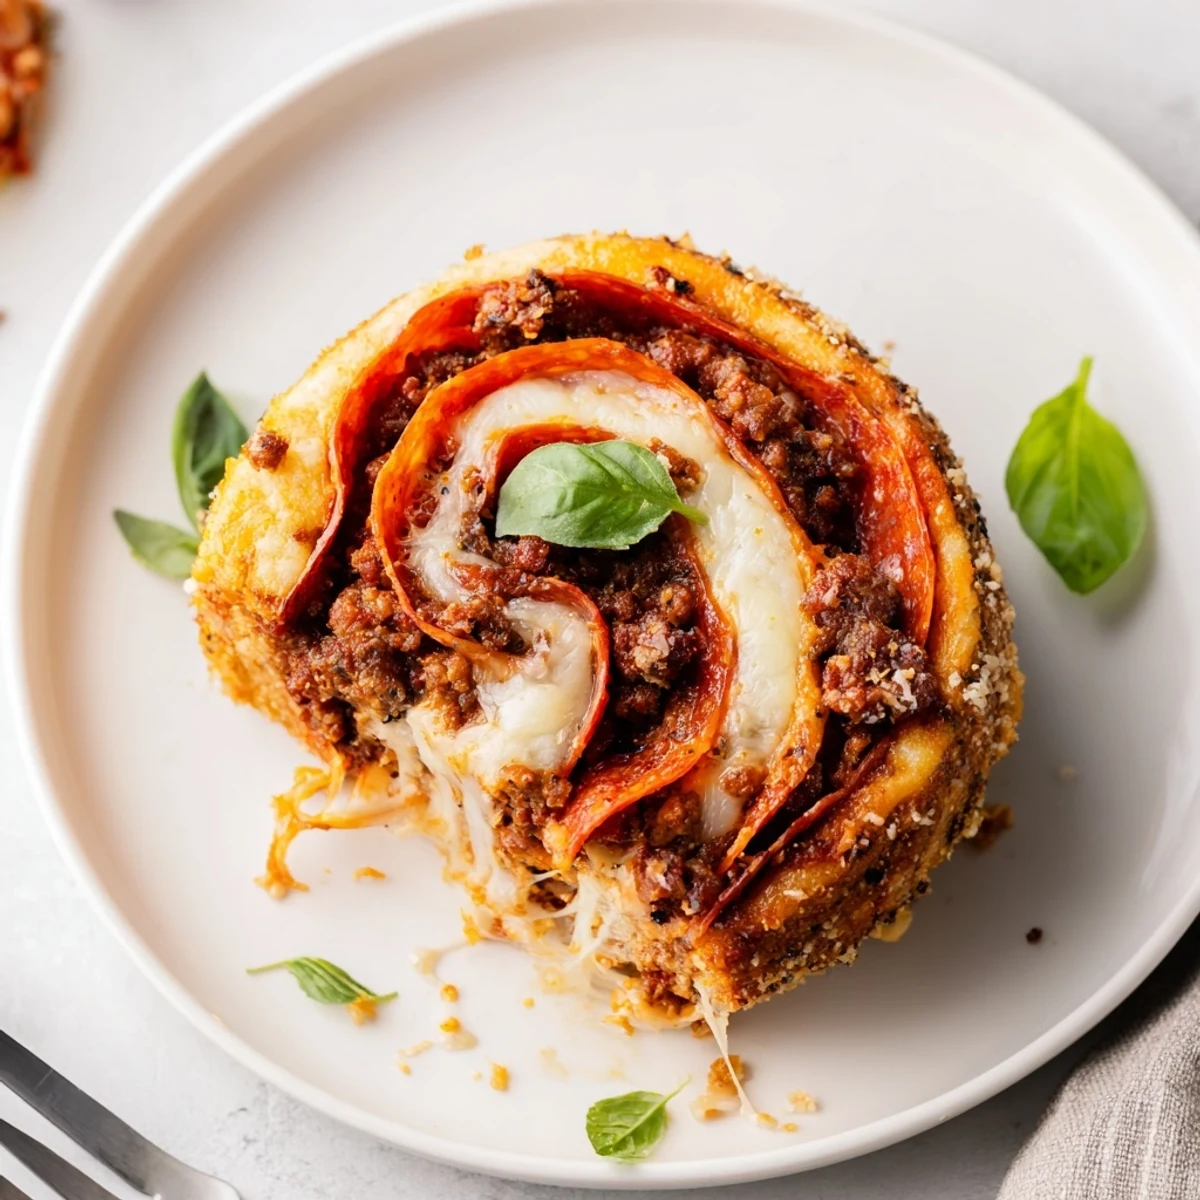
 These cheesy pizza roll ups combine seasoned ground beef, spicy pepperoni, and a blend of mozzarella and Parmesan wrapped in refrigerated pizza dough. Brown the beef with garlic powder and Italian herbs, spread sauce over rolled dough, layer fillings, roll tightly and slice into eight pieces. Brush with olive oil and bake at 200°C (400°F) for 12–15 minutes until golden and bubbly. Cool slightly, garnish with basil, and serve with extra sauce. Freeze assembled rolls for easy make-ahead meals or swap meats and add sautéed peppers for variation.
Sizzling pepperoni mingling with rich mozzarella—that heady aroma once triggered a stampede of friends from the living room to my kitchen counter. I didn‘t set out to impress; I just wanted a snack that was equal parts comforting and exciting, the kind you inevitably burn your fingertips on because you refuse to wait. Pizza roll ups walked the line between a midnight treat and a party hit, and somehow managed to satisfy everybody. Their golden crispness became synonymous with low-key gatherings and quick fixes when cravings showed up unexpectedly.
When my nephew came over for a post-soccer snack and eyed the kitchen suspiciously, I made these roll ups as a peace offering. He perched on a stool, tracing shapes in a dusting of flour, and by the time the first batch emerged from the oven, we were both grinning and sneaking pieces straight from the pan. The sound of cheese bubbling and edges crackling became a shared language between us, spoken in anticipation over plates balanced a little precariously in our laps.
Ingredients
- Ground beef: Gives the rolls heartiness; browning it well helps deepen the flavor—drain off most fat for a lighter bite.
- Pepperoni: Spicy slices pack a punch; layering them evenly ensures every swirl has a little kick.
- Shredded mozzarella cheese: Melts beautifully for that much-loved stretchy texture. Sprinkle just enough to hold everything together.
- Grated Parmesan cheese: Saltiness and sharpness in the crusty edges—don‘t skimp if you like a tangy, golden top.
- Refrigerated pizza dough: Makes for a shortcut base with consistent results—let it come slightly to room temperature for easier rolling.
- Pizza sauce: Sweet and herby, just enough to glue everything; spreading it thinly keeps the rolls from getting soggy.
- Dried Italian herbs: Lifts the flavor to pizzeria levels; rubbing them between your fingers releases the oils.
- Garlic powder: Adds background warmth—a little goes a long way.
- Salt and pepper: Key to seasoning every layer, but taste as you go to avoid overdoing it.
- Olive oil: Brushed on top, it crisps the rolls and adds a gentle golden gloss.
- Fresh basil or parsley (optional): A sprinkle turns snack into special—wait until serving to add for the freshest green pop.
Instructions
- Get your oven ready:
- Heat to 200°C (400°F) and line your baking sheet with parchment to save on scrubbing later.
- Brown that beef:
- Sizzle ground beef in a hot skillet with salt, pepper, Italian herbs, and garlic powder; stir as the color changes and the kitchen starts to smell incredible, then drain off the fat and let it cool a couple moments so you don‘t burn your hands later.
- Prep the dough:
- Roll out the dough on a floured counter until it forms a soft rectangle—aim for even thickness so every roll bakes perfectly.
- Saucy base layer:
- Spoon pizza sauce gently, stopping just short of the edge to leave a clean border (this prevents leaks as they bake).
- Load it up:
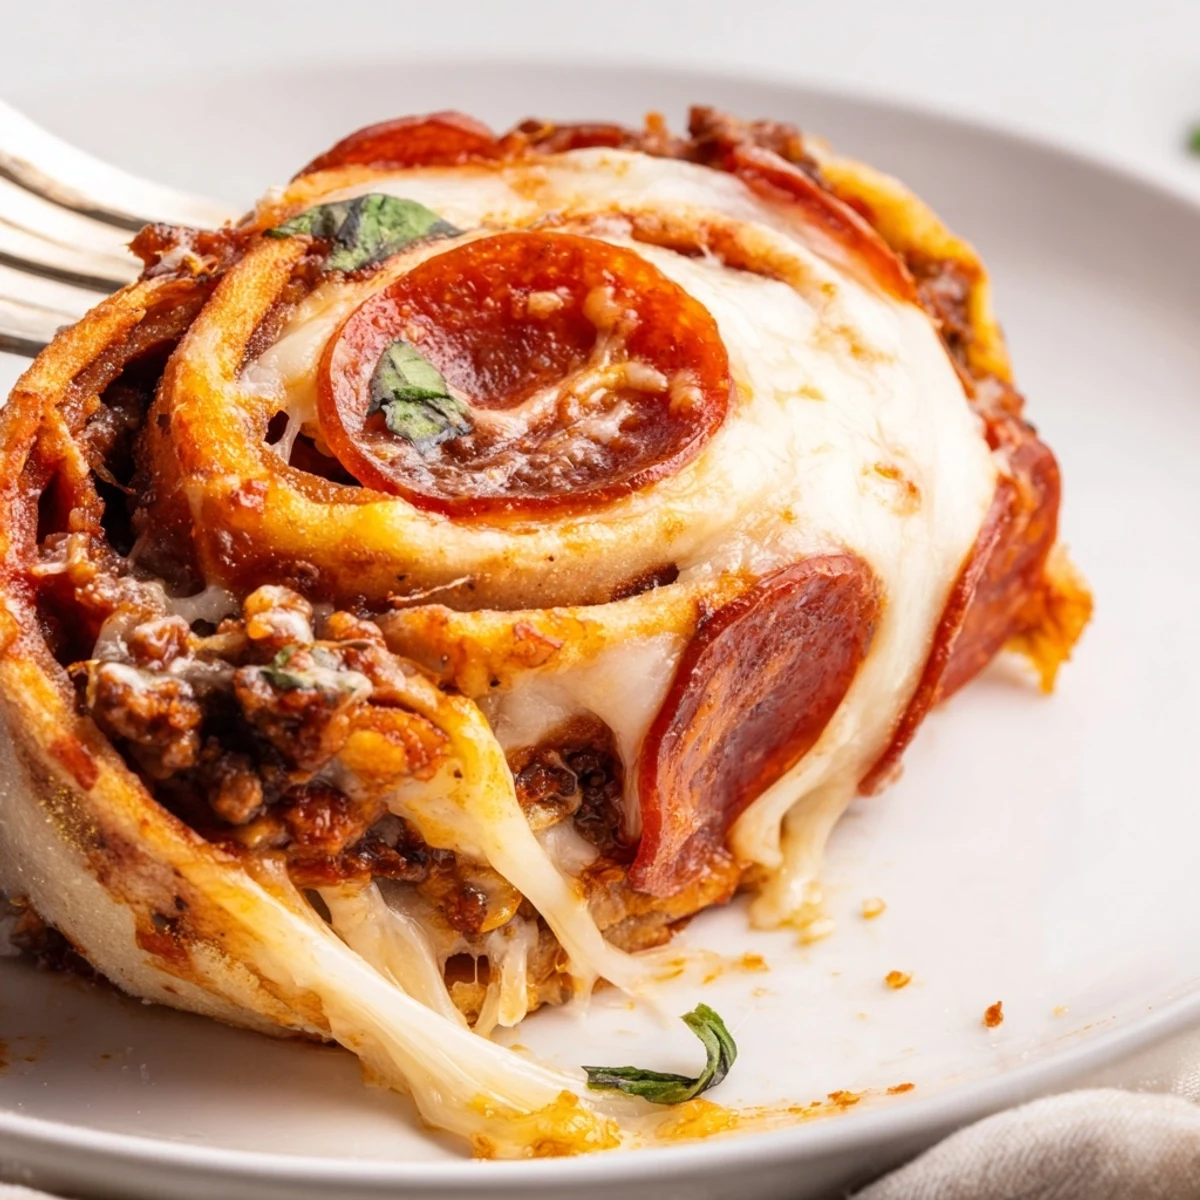
- Scatter beef evenly, lay on the pepperoni, then rain down mozzarella and a dusting of Parmesan—resist the urge to overfill for tighter rolls.
- Roll and slice:
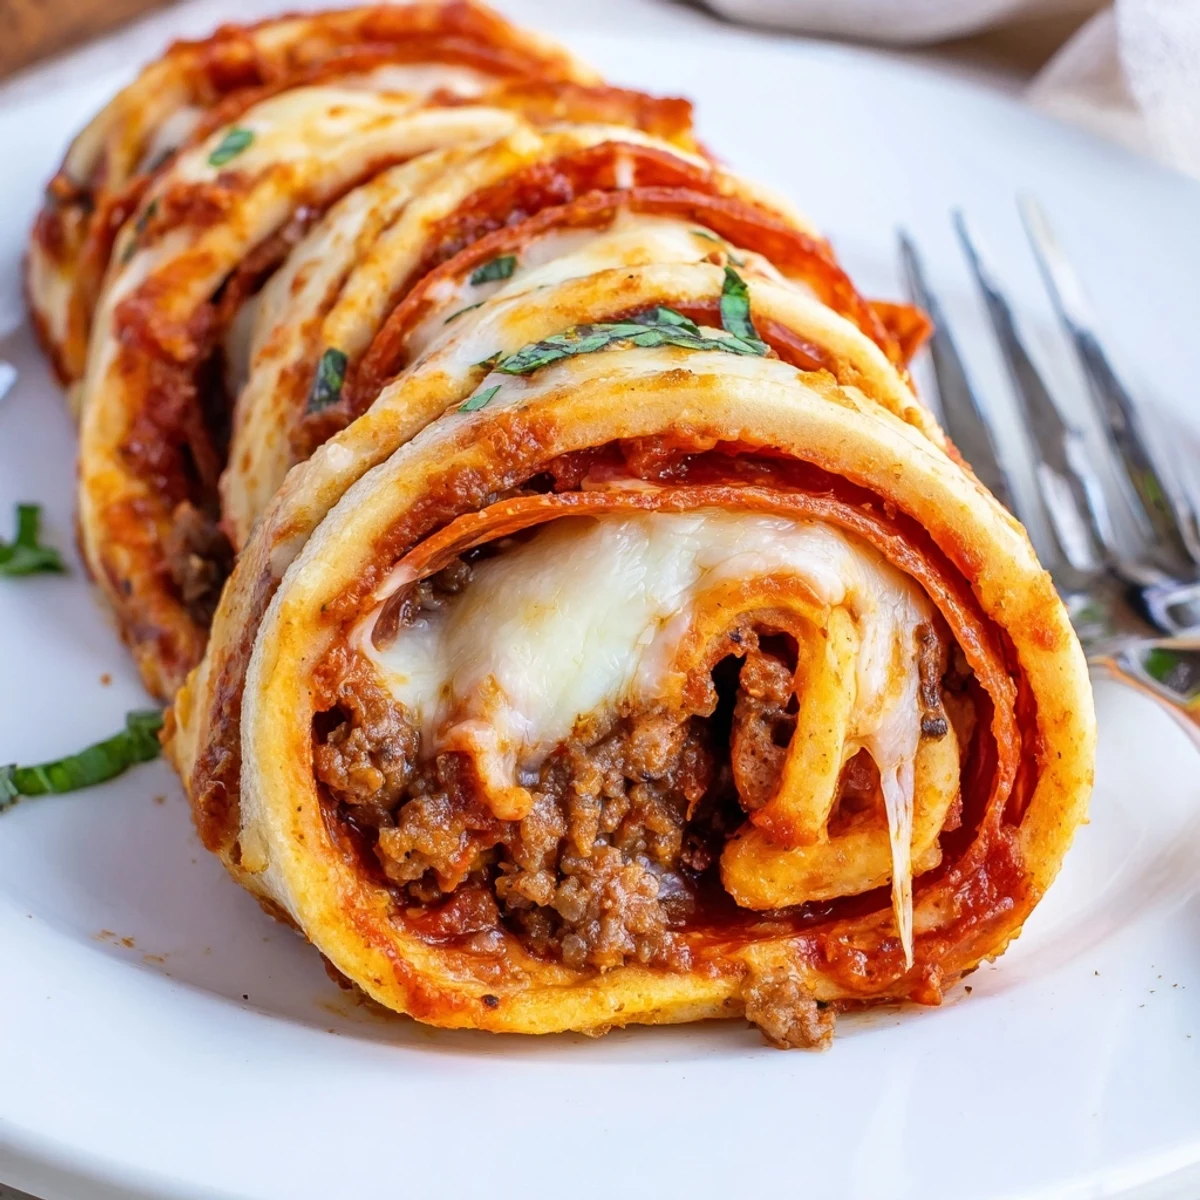
- Starting from the long side, roll the dough up snugly like a log, pinching the seam; using a sharp knife, cut into eight even slices and reveal those beautiful spirals inside.
- Bake for glory:
- Arrange rolls cut side up on your tray, brush their tops with olive oil, and bake until the cheese bubbles enthusiastically and everything is golden (12–15 minutes).
- Cool and garnish:
- Let them cool just enough to handle (few minutes), sprinkle fresh herbs if you like, and serve with more pizza sauce for generous dipping.
 Pin it
 There was a Saturday when these roll ups turned into the center of a laughter-filled game night, and the last piece was rock-paper-scissored over with more intensity than anyone cared to admit. That‘s when I realized this simple snack had the ability to turn an ordinary moment into a small celebration. Now whenever I‘m asked to bring something, people nudge me with raised eyebrows and whisper, ‘Those pizza rolls?’
Getting The Dough Just Right
I found that letting the dough rest out of the fridge for fifteen minutes makes it so much easier to roll out, avoiding frustrating shrinkage. Lightly flouring your surface (and even the rolling pin) keeps sticking at bay without toughening the crust. Don‘t worry about making a perfect rectangle; uneven edges bake up just as delicious, and the rustic look only adds charm.
Mastering Fillings and Toppings
More filling is not always better—cramming in too much can cause the rolls to burst their seams and leak glorious cheese onto the tray instead of your plate. If you prefer a spicier bite, swap in jalapenos or use hot pepperoni for an extra kick. A sprinkle of Parmesan right before serving gives them an addictive savory crust that never fails to please.
Pizza Roll Up Hacks I Swear By
Reheating leftovers in the oven keeps the rolls as crispy as the day they were made—microwaving is the enemy here. For big batches, assemble the rolls ahead and pop them in the fridge until ready to bake for stress-free hosting. Freezing works wonders: just wrap tightly, and crisp up straight from the freezer whenever the craving hits.
- Allow space between rolls on the tray for even browning.
- A little sauce goes a long way—overdoing it creates soggy bottoms.
- Always taste your beef filling and adjust seasonings before rolling up.
 Pin it
 Pull these cheesy roll ups from the oven and you‘ll see how fast they unite a crowd. Here‘s to snacks with heart, a little mess, and plenty of melted cheese to go around.
Recipe Q&A
- → How do I avoid soggy bottoms?
-
Drain excess fat from the cooked beef and spread sauce thinly to limit moisture. Bake on a preheated sheet or use parchment and a hot oven so the bottoms crisp quickly. Brushing the tops with olive oil helps create a golden exterior while preventing sogginess.
- → Can I make these ahead and freeze them?
-
Yes. Assemble and place the roll log on a tray, freeze until firm, then slice and store in a freezer bag. Bake from frozen, adding a few extra minutes, or thaw overnight in the fridge and bake as directed to restore crispness.
- → What's the best way to reheat leftovers?
-
Reheat in a 180°C oven or an air fryer until warmed through and crisp. Avoid the microwave if you want to retain a crunchy exterior and melty interior—it tends to make the dough soft.
- → Can I swap the beef or add vegetables?
-
Absolutely. Use ground chicken or turkey for a lighter filling, or fold in sautéed bell peppers, onions, or mushrooms. Adjust seasoning and drain any excess moisture from vegetables before assembling to keep the dough from getting wet.
- → How should I handle the dough for best results?
-
Roll the refrigerated dough on a lightly floured surface into an even rectangle and work quickly so it stays cold. Roll tightly to avoid gaps, pinch the seam well, and cut with a sharp knife to keep edges neat and prevent fillings from escaping.
- → Any tips for flavor variations?
-
Mix grated Parmesan into the mozzarella for nuttier flavor, swap in spicy pepperoni or add a pinch of chili flakes to the beef for heat, or top with fresh herbs after baking for brightness. A drizzle of olive oil before baking deepens color and flavor.